Archived Classes
Listed below are classes we have run in the past and may (or may not) run again in the future. If you see something of interest please e-mail us. We can let you know if the class is being planned again for the future.
Build a Sharpening Box with Bob Van Dyke

A few years ago I had to do a sharpening demonstration at one of the woodworking shows and while I was collecting my stuff I realized how incredibly disorganized I was. Stones were in one drawer, honing guide in another, projection jig hanging on a hook and water sprayer on a shelf. What a lot of steps just to get ready to sharpen a chisel. I came up with this box which keeps all my sharpening paraphernalia in one place and I can even use it as a solid, self-contained platform to do my sharpening on. The box was featured on the cover of Fine Woodworking Magazine in June of 2016. In this weekend class we will make the basic box (which is a lot more complex than it looks!), apply waterproof plastic laminate to the top work surface, make the stops for the projection jig on top and then make the inside dividers custom to the sharpening tools that you use every day. Sign up today– This is a great opportunity to get your sharpening tools all in one place and get organized! Tuition $275.00 plus materials.
Section 092416A: Saturday & Sunday, September 24 & 25, 9:30am—5:00pm
General tool list (will open in a new window)
Build the Oliver Ellsworth Card Table with Will Neptune

Oliver Ellsworth was the 3rd Chief Justice of the US Supreme Court and, for those of you who remember your American history, was the author of the Constitution’s Connecticut Compromise. The story is that Ellsworth acquired a pair of mahogany card tables while travelling through Boston on his return from France in the late 1700’s. Speculation exists as to their origin- were they made in Boston or Connecticut? After studying the tables closely, we suspect they may have been built here in Connecticut. The use of cherry for the fly rail and the overall excellence of the construction suggest Connecticut origins.
There are two of these tables now- one at Windsor Historical Society and its twin up the road at the Ellsworth Homestead. We hope to add another 8 or 10 of these tables- made in Manchester this time!
Will Neptune and Bob Van Dyke have studied and measured the original table and we are looking to recreate exact copies in a unique four weekend class starting in October.
This table features a number of challenging technical problems. Aside from working with the birdseye maple veneer covering the serpentine aprons, the skills you will be exposed to include making the knuckle joint in the cherry fly rail- and adjusting it so the table leg swings properly, setting in the rosewood crossbanding and making the rosewood cockbeading along the bottom edge of the table. Not the least challenging is the installation of the special card table hinges that will allow the top to pivot open and closed and sit properly on the hinged leg.
The format of this class; one weekend per month for a total of 4 weekends allows us to take on ambitious projects because any “busy work” can be done at home in your own shop rather than taking up valuable class time. We will also be scheduling a “field trip” to the Windsor Historical Society so you can all study the original. Because woodturning is a completely different set of skills, the legs will be turned by a professional woodturner we have used extensively in the past.
This is an elegant and refined card table which will become an heirloom in any family- just as it was in the Ellsworth family.

Sign up today- space is limited. Tuition $1195.00 plus materials
DATE CHANGE- New start date: Class will begin October 29
Section 102916A: Saturday & Sunday, October 29 & 30, December 3 & 4 & January 21 & 22, February 18 & 19 9:30am – 5:00pm

General tool list (will open in a new window)
Beyond Basic Inlay - Working with Shell, Mother of Pearl and Metals with Mike South

Mike South will introduce students to the basics of cutting and inlaying various types of shell products and other materials into musical instruments and other flat surfaces. The techniques are applicable to many different materials such as veneers, brass, silver and gold sheet stock and some of the softer natural and reconstituted stones. Topics will include the choice of needed tools and supplies, types of materials, techniques for reproducing artwork for use as templates and techniques for cutting the materials and inlaying them into surfaces for decoration and embellishment. Although Mike’s current specialty is stringed instruments, he has years of experience in wood turning as well as furniture design and construction so the techniques can be used in decorating these types of projects as well. Students will be introduced to the basics of how to position themselves so that the time spent cutting is used to best advantage. Layout and routing of the channels for the inlays will be explained so as to make for the cleanest outcomes. Traditional patterns and motifs will be supplied by the instructor, but if students have designs or artwork that they’d like to try, they’re encouraged to bring it to class. Specialized tools and various types of shell will be available from the instructor. Other basic supplies can be purchased locally. A list of suppliers will be included so students can acquire materials and tools for future projects. Inlay work can be very challenging but also a lot of fun. Proper instruction goes a long way and the rewards for patience and persistence are very satisfying. Sign up Today! Tuition: $275.00 plus materials ($75.00)

Section 112319B: Saturday & Sunday, November 23 & 24, 9:30am—5:00pm
![]() Tool_list_Mike_South_Beyond_basic_Inlay-_Shell_metal_mother_of_Pearl_2019.pdf
Tool_list_Mike_South_Beyond_basic_Inlay-_Shell_metal_mother_of_Pearl_2019.pdf
Beginning Electric Guitars - Build a Telecaster or Stratocaster with Mike South

In this class we jump into the world of electric guitar construction. Students will each build their own guitar based on the world famous Fender Telecaster (yeah- that’s the one Bruce Springsteen plays!) or the equally famous Fender Stratocaster.
Starting with a solid wood body we will bandsaw and rout the basic shape, fit and fine tune the maple neck (we will purchase pre-made necks for this beginning class), fine tune the rosewood fingerboard and install all the hardware, electronics and both pickups. Finishing is an important part of any guitar so we will also spend portions of the class time applying your choice of finishes. The end of the class will be final setup & tuning of the guitars and then a jam session to prove how good they are! Mike South has been building guitars, banjos and mandolins since 1981 and is the owner of Windjammer Instruments. Sign up today for this exciting class and have the satisfaction of building (and playing) your own heirloom quality instrument. Specify preference for Strat or Tele, rosewood or maple fingerboard and black or white pick guard when registering.
This class meets over two weekends.
Tuition $495.00 plus materials ($439.00).
Section 080820B: Saturday & Sunday, August 8 & 9 and September 12 & 13 , 9:30am- 5:00pm
NOTE- This class was originally scheduled to meet June 13, 14, 27 & 28. Rescheduled due to Covid-19
General tool list (will open in a new window)
Building Hollows and Rounds with Matt Bickford

The amount of handwork that goes into our craft varies drastically among us. Some use hand tools for all aspects while many of us rely heavily upon machinery. As we start to progress towards working with our hands we tend to hide our first adornments, dovetails, behind drawer fronts. We allow machines to be in charge of the single element of decoration that embellishes most of our work: the moulding. There is a set of tools that allows us to take control of this feature. This set of tools, hollows and rounds, can be comprised of several pairs of planes that create varying convex and concave radii. A set of hollows and rounds will give you the opportunity to mould the edges of your work in a fashion you want, not limited by the catalogue of options that routers and shapers afford.In this weekend class we will be bring a round plane to completion and each student will leave with the necessary skill, experience and material to make a matching hollow. Completing this project will teach the necessary skills of replicating the technology included in these centuries old tools.
This two-day class is ideal for anybody interested in working with this type of tool; regardless of whether your ultimate set is comprised of 2 pairs or 9, antique or new. In this workshop, Matt Bickford will guide you through the process of making a pair of #8s (8/16” radius) with a side escapement. Students will start with a beech billet and learn the many steps involved in creating a very versatile tool.
Among the many skills to be addressed are making an accurate mortise with floats, fitting a wedge, mating an iron to the bed of your plane, addressing a side escapement, heat treating, and attending to the iron’s various edges.
The class will focus on making a single, simple moulding plane, but much of the tooling and processes is directly relatable to making or rehabilitating any wooden plane. This class is limited to six people.$425.00 plus materials ($95.00)
Section 120719A: Saturday & Sunday, December 7 & 8, 9:30am—5:00pm 
Sharpening Carving Tools with Will Neptune
 This hands-on class features a day of sharpening and re-shaping of carving tools with nationally known furnituremaker and woodcarver Will Neptune. The tools that you buy are no where near ready to do good work. Even the “Swiss-Made” brand need significant regrinding in order to perform at their best. In this class students will regrind and sharpen at least one straight gouge along with a V tool, a double bevel skew and possibly a fishtail or backbend. With this hands-on practice you should be able to understand what is needed to keep your carving tools up to their total potential and be able to concentrate on your carving rather than the tools to do it! Sign up today– Space is limited.
Tuition: $145.00 materials included
Section 111917B: Sunday, November 19, 9:30am – 5:00pm
Black & White Bandings-An Intro to the Fascinating Art of Making Decorative Bandings with Michael Wheeler
 At the turn of the 18th Century, Federal Period 1790-1820, wealthy Boston Merchants were expanding trade routes to the Middle East, West Indies and China in their quest for whale oil. They brought back spices, pottery, fabric, furniture embellished with semi-precious stones and ivory. America was in the mist of a big celebration (25 years as a free nation) and wanted new, refreshing and exciting furniture. Cabinetmakers in Boston were creating a new style of furniture based on neoclassical designs. New specialists known as inlay and paterae makers were showing up to supply cabinetmakers with those specialized decorative items. Decorative bandings were created as craftsmen began to develop intricate patterns made by stacking and cutting these rare woods, cut into veneers, into specific geometric shapes gluing them into logs or “bricks”.They were than cut into thin strips ready to be set and glued into the surfaces of the furniture being made. These skills & patterns were very guarded and unfortunately were lost over time.
This hands on class with Boston restoration specialist, Michael Wheeler, will begin the process of recovering & teaching those long lost techniques and tricks of the trade. The pictured bandings all begin as a simple stack of black & white veneers, glued up to form a log. Depending on how the log is cut and reglued they create completely different patterns of bandings. Think of this weekend class as the beginning to the fascinating and frequently mind twisting world of decorative bandings. They can be used on any number of your woodworking projects from highly embellished furniture to boxes, trays,and even picture frames.
Michael Wheeler, Owner of Tomorrow’s Antiques, Boston, MA, NBSS Cabinet/Furniture Making 77, has been repairing and restoring Period Americana for over 40 years, specializing in Federal Furniture. He ’s been collecting & researching New England and Imported bandings & paterae’s for over 25 years. Sign up today. Space is limited. Tuition: $275.00 plus materials
Section 120217A: Saturday & Sunday, December 2 & 3, 9:30am – 5:00pm
Sand Shaded Bandings-The Fascinating Art of Making Decorative Bandings with Michael Wheeler
The rest of the write up will follow soon, but suffice it to say– the bandings class we did with Michel Wheeler in early December was great! People had a great time and learned
a whole lot about this fascinating and seemingly complex collection of techniques. In this next weekend class in what we hope will become a regular series of ornamentation classes we will concentrate on making decorative bandings that incorporate the technique of sand shading. This is a unique technique where parts are singed in hot beach sand to produce a three dimensional appearance. It is great fun and something that can be incorporated into just about any woodworking project. Michael Wheeler, Owner of Tomorrow’s Antiques, Boston, MA, NBSS Cabinet/Furniture Making 77, has been repairing and restoring Period Americana for over 40 years, specializing in Federal Furniture. He ’s been collecting & researching New England and Imported bandings & paterae’s for over 25 years. Sign up today. Space is limited.Tuition: $275.00 plus materials
Section 060218A: Saturday & Sunday, June 2 & 3, 9:30am – 5:00pm
Essential Bench Jigs with Mike Pekovich

A sturdy bench and sharp tools are just the start when working by hand. It's also critical to support the work properly for each task and that's where bench jigs come in. The>good news is that it's fast and easy to make many of the jigs you need for accurate bench work. Join Mike Pekovich for a one-day class and build the tools that will help you with accurate planing, sawing and shooting furniture parts. Start by making an accurate shooting board for squaring ends and truing miters. Then make plane stops to handle a variety tasks. We'll finish off the day with saw hooks for crosscuts, miters and delicate trim. You'll walk away with all the jigs you need to improve your working wood with handtools. Sign up today for this unique and useful class. Tuition $125.00 plus materials
Section 052116A: Saturday May 21, 9:30am – 5:00pm
Cabinet Wood Identification with Randy Wilkinson- Its not as simple as it seems!
 Did you ever look at a piece of wood and wonder what wood it is? And why it looks the way it does? Were you ever confused about which wood it is: mahogany or walnut, cherry or poplar, especially if you are looking at an antique that has an aged finish on it? Distinguishing mahogany from walnut may be easy in the unfinished state, but it is not that straight forward when looking at an aged surface.
This two-day hands-on workshop will explore all these topics and more. It is designed specifically for curators, collectors, antique dealers, appraisers, and woodworkers. The goal of this workshop is to familiarize the student with the physical properties of wood and recognize species specific wood cell structures of nineteen different species. It will also discuss the social, political and economic factors that led to the trade in some of our most cherished woods. Case studies will be introduced to show the importance of identifying wood correctly. Not knowing what species of wood you are looking at is sometimes more important than knowing what it is.
On Saturday, basic wood anatomy will be introduced, including grain, figure, fundamental differences between softwoods and hardwoods, and more. The student will learn to identify common hardwoods that are used in antique furniture using a 10x loupe.
On Sunday, the class will be held at the Webb Dean Stevens house in Wethersfield (about 10 minutes from CVSW). Sunday’s class will run from 11:00am – 4:00pm. Students will get a rare opportunity not only to see one of the finest collections of American furniture, but also to identify woods used in a selection of great objects in an intensive and hands-on inspection.
No experience is necessary. Tuition $365.00, plus materials which includes a hardwood sample kit, 10x loupe, The “Wood ID Bible”- Identifying Wood by Bruce Hoadley and admission to WDS. Class size is limited to 8 students. Sign up today!
Section 032523A: Saturday & Sunday, March 25 & 26, 9:30am-5:00pm
Call 860.647.0303 to sign up for any class on this website

Carving Regional Styles of Ball & Claw Feet with Will Neptune
 Ball and claw feet were frequently used for tables, chairs and case pieces in the 18th Century. Each region had its own variation along with a matching strategy for carving them. If you have taken classes with Will Neptune you may know the Philadelphia form or the related Chapin ball & claw feet of Windsor CT. For this three day class, we will tackle the three main regional forms: New York, Philadelphia and Boston. After you have learned one type, the others are easier to understand. For each of these regions, you will learn how the pattern is developed and how it controls the shape. Each style of foot will be broken down into a series of clear steps that help make a set of matching feet in an efficient way. Previous experience with Will's approach for carving feet would be helpful but not necessary. Even if you have previously done a B & C class with Will, this class gives you the opportunity to review the Philadelphia (Chapin) style and then add two more regions to your repertoire.
Some specific carving tools will be required. This list will be on the website soon. Sign up today. Do not miss this opportunity to learn from one of this country’s premier woodcarvers and furniture makers.
Tuition $375.00 plus materials
Section 060316A: Friday, Saturday & Sunday, June 3, 4 & 5, 9:30am – 5:00pm
Tool List:
Figuring Out Compound Angles with Steve Brown
 The objective of this weekend class is to gain understanding of compound angle issues in woodworking and to understand general and specific solutions for building a box with sloped sides and a table with canted legs.
First, we will look at the problem and in particular the common misconceptions of what we are seeing versus what is actually going on with a piece having sloped sides. With examples, models and drawings we will puzzle through the distortions in order to clarify the true information.
With this new understanding we can then discuss some of the strategies that can be used to solve the problems in actual practice. We will look at a solution that helps to solve the problem in a clear mechanical way without relying on complicated math or complex drafting yet still giving us a clear and accurate way to proceed.
In this class we will work on examples of two basic compound angle forms- a box or tray with canted sides and a table with splayed legs. The accurate execution relies on the use of a gauge block to set up the tablesaw accurately We will explore the joinery typically used including butt joints, miters, dovetails & mortise & tenons. Tools required in addition to the basic tool list include: bevel gauge, marking gauge and dividers. Steve has been a lead instructor at North Bennett Street School in Boston for over 15 years and I am pleased to have him teaching here at CVSW.
Sign up today- This is a class that will answer your questions on what is admittedly a challenging joinery problem.
Tuition: $275.00 plus materials
Section 110516A: Saturday & Sunday, November 5 & 6, 9:30am – 5:00pm
Simple and Straightforward Contemporary Inlay with Steve Latta
 For hundreds of years, inlay has proven to be a wonderful way to spice up any project, be it a federal sideboard or a modern jewelry box. In this class, students will learn some basic techniques that will give a huge return in style for a relatively small investment in time. The idea here is to concentrate on simple techniques and designs that can be incorporated into any work with a minimal amount of tools or time. We will concentrate on more contemporary designs that draw on traditional inlay ideas. We’ll also look at both traditional and modern tooling and, time permitting make some simple inlay tools. Regardless of your tastes, you’ll definitely learn some great techniques that you can use to enhance your work. It is always amazing how such a little detail can add so much to the overall impact of a piece. Take this great class and you will see what we mean! Sign up today. Tuition: $275.00 plus materials
Section 111916A: Saturday & Sunday, November 19 & 20, 9:30am – 5:00pm


General tool list (will open in a new window)
![]() Tool_list_Steve_Latta_Intro_to_Inlay.pdf
Tool_list_Steve_Latta_Intro_to_Inlay.pdf
Make a Cutting Gauge with Bob Van Dyke

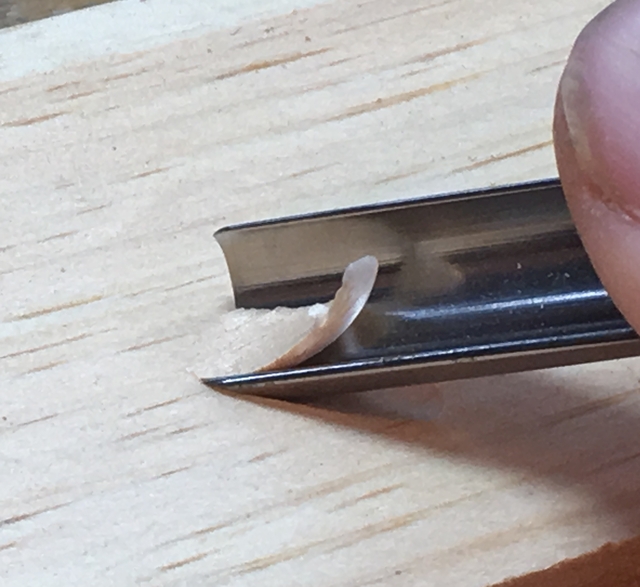
One of the foundations of superior furniture making is good layout. Good layout is based on the ability to cut a single accurate layout line. This is accomplished with a good layout knife and a good cutting gauge. Surprisingly good cutting gauges seem to be a thing of the past. Sure- there are some out there with really pretty rosewood and brass- but if you look a little closer you see how badly they are made, how poor the cutter is (it is ground incorrectly and it is usually installed backwards!) and they are really expensive!
Why not join Bob Van Dyke in this weekend class to make you own cutting gauge. Based on a design he learned from woodworking expert Will Neptune, this gauge has all the attributes of a great marking tool. It has a large face to register solidly against any surface, a long beam (12”) which lets you use it like a small panel gauge and, most importantly, a single bevel spear point cutter made from a Ron Hock marking knife. In your choice of cherry or walnut. This tool will out perform any cutting gauge on the market today- and- you made it yourself! Sign up today. You will learn some good woodworking techniques, shape your own cutting gauge to fit your hand and learn how to sharpen and use the tool, accurately over and over, meet some new people and have a good time doing it! Tuition $145.00 plus materials ($23.00)
Section 030521A: Friday, March 5 9:30am - 5:00pm
Note: cutting gauge photo by Fine Woodworking Magazine staff
General tool list (will open in a new window)
SketchUp Success for Woodworkers with David Heim
![]()
This class is for people who are serious about woodworking and want to learn how to use the SketchUp 3D design program to save time and money in the shop. With SketchUp, you preview the actual construction of a piece and generate absolutely accurate plans, patterns, and templates. The class is built around four rules for success for using the program to its best advantage. You bring a Windows or Mac laptop loaded with the free version of SketchUp. We spend the morning on exercises that introduce the important SketchUp tools and get you accustomed to working in a 3D space on the computer. In the afternoon, you see how the rules for success work by designing a piece of furniture. You'll also learn how to create measured drawings and a cutlist. Go to www.sketchup.com/download/all to download the free version, called SketchUp Make 2017. Please don’t use a web-based version, called SketchUp Free.
David Heim is the author of SketchUp Success for Woodworkers and the instructor for the new SketchUp for Woodworkers web site. When he’s not teaching, he’s using the program to generate models of famous furniture.
Tuition: $145.00. materials are included
Section B: Saturday , , 9:30am - 5:00pm
Call 860.647.0303 to sign up for any class on this website
Tansu-Style Wall Cabinet with Mike Pekovich
 This creative twist on the wall cabinet packs a lot of woodworking lessons into a small package. In this six-day class with Mike Pekovich, you'll learn the basics of dovetailed case construction as well as cutting through tenon joinery. You'll also learn to build and hang a door, add partitions to a case, and make classic dovetailed drawers. This striking cabinet is also a great exercise in combining a variety of elements into a single piece to create an eye-catching design. Finally, as a small bonus you will get a chance to try your hand at the decorative latticework technique of kumiko when making the door panel. Don’t miss this opportunity to work with one of our best craftsmen and teachers in constructing this heirloom wall cabinet. Sign up today. Tuition: $945.00 plus materials
Section 111922A: Saturday – Monday, November 19—21 & Saturday—Monday, December 10—12, 9:30am—5:00pm

General tool list (will open in a new window)
Creating Federal Shell Paterae with Don Williams
 One of the hallmarks of Federal style furniture is the small oval inlay compositions known as "patera," a term probably derived from Roman oval serving trays. One of the most popular expressions of this art form is the stylized conch shell patera, and in this one-day hands-on workshop you will be able to execute a completed patera yourself, ready for inlaying into a project once you go home. The processes of sawing and shading the elements with scorching sand will be demonstrated first by the instructor and then you will get on to making your own. All tools and materials will be provided by the instructor. Tuition: $149.00 plus materials.
Section 061117A: Sunday, June 11, 9:00am—5:00pm


Repairing Damaged and Missing Veneers with Don Williams
 If the historical evidence (i.e. inept repair) is any indication the problem of repairing and replacing missing veneers is one that has flummoxed furniture craftsmen for generations. The main issues for successful veneer restoration are 1) getting the grain pattern right, 2) making the new piece to fit the void of the loss perfectly, and 3) understanding and exploiting the properties of the adhesives, especially hide glue. These topics, and more, will be covered in this one-day hands-on workshop. The tools for this are simple, and nothing is more useful than to have a good inventory of veneer scraps in-hand. Tools and materials will be provided by the instructor, but if you have a small veneer repair project to work on, bring it along. Don’t miss this unique opportunity to work with one of the leading experts in this field. Don recently retired from the Smithsonian Institution where he was a senior conservator for over 3 decades. Don is also the editor and translator of the Andre Roubo books published by Lost Arts Press and the Author of Virtuoso: The Tool Cabinet and Workbench of Henry O. Studley.
Tuition: $149.00 plus materials. 
Section 061017A: Saturday, June 10, 9:00am—5:00pm
Mission Rocker Drop In Seat with Mike Mascelli
 This is a class specifically designed for students who have completed the one week Mission Rocker class with Mike Pekovich.
In this one day class, students who have completed their seat frames will get a short general introduction to basic upholstery, and then learn all of the specific techniques to professionally upholstery the seat for their chair. We will begin with installation of “zigger” springs and a sturdy decking material to form the foundation for the upholstery treatment. The padding layers will then be built up with firm foam, softer foam and finally a Dacron batting, all of which will be consolidated with a full muslin sub cover to create the final “sit” and “loft” for your chair. With the under upholstery complete, the show cover of premium leather-look vinyl will be properly tucked and folded, and the seat then finished off with a proper black dust cover on the bottom, making it ready for use.
The materials fee will include all of the required springs, padding, muslin and vinyl show cover (choice of brown or tan), and students may either bring their own tools or use loaner tools available in class. Students who wish to purchase their own genuine leather show covers should be sure that they are 3-4 oz (1.0 – 2.6mm) in weight and at least 30 x 30 inches of clear unblemished material. One yard of other suitable upholstery fabric can also be substituted for the vinyl. Sign up today: Tuition: $125.00 plus materials
Section 063019A, Sunday, June 30, 9:00am—5:00pm
Note: If you are interested in taking this class but are not a part of the Mike Pekovich rocker class then please contact Bob Van Dyke—This email address is being protected from spambots. You need JavaScript enabled to view it. to make arrangements.
Beyond the basic dovetail with Will Neptune
 Dovetails are one of the basic joints in any fine furniture. They hold the parts together mechanically and do not rely on glue or mechanical fasteners and thus they outlast any other form of joinery. Basic through and lapped (half blind) dovetails are common place and have been covered in many other classes. This unique class with Will Neptune will concentrate on the factors necessary to cut any precise joinery, i.e.. sharpening, accurate layout and precise saw and chisel control. We will then go on to explore the techniques to cut other types of dovetails by hand- The sliding dovetail joining the legs to the turned base of a tripod table, the dovetails joining the drawer dividers in a chest of drawers and the housed tapered dovetail- frequently called a sliding dovetail, are just a few of the joints we will concentrate in this hands on class. Don’t miss this great opportunity to learn more about joinery from one of this country’s best craftsmen and instructor.
Sign up today- class size is limited.
Tuition: $295.00 plus materials
Section 101417A: Saturday & Sunday, October 14 & 15, 9:30am – 5:00pm
general tool list  (will open in a new window)
Learn to Carve a Concave Newport Shell and a Block Front Drawer Front with Al Breed
 Some of the most iconic furniture made in the colonies was done in Newport, Rhode Island. Major elements of these pieces are the blocking and convex and concave shells on the doors and draws. In this class we’ll do the concave shell and blocking of a Newport draw front. This will involve the layout and carving of the concave center shell as well as the process involved in doing a blocked section of the front.
The work will be sized so that you may use it as part of a chest, should you decide to make one.
Tuition: $325.00 plus materials
Section 030318A: Saturday & Sunday, March 3 & 4, 9:00am—5:00pm

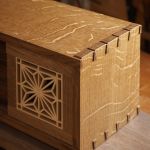 Build a Tansu Style Tea Chest with Mike Pekovich

Lots of fun surprises in a small package. This tea chest sits on a live-edge base and features a sliding door and four drawers. You’ll get to try your hand at dovetailed case construction, mitered partitions and a kumiko door panel in a two-weekend class. Mike Pekovich will lead you through this fun project start to finish and you’re bound to come away with some new skills and a new appreciation for the challenges and beauty of white oak.
Mike’s elegant design has an Oriental, Arts & Crafts and rustic feel to it and can fit just about anywhere and will make a welcome addition to any room. Mike Pekovich is the Editor and Executive Art Director at Fine Woodworking Magazine and is an accomplished furniture maker and instructor. His original designs are both inspiring and elegant in their simplicity. Sign up today. Space is limited. (The pottery Tea Pot is not included….)

Tuition: $695.00 plus materials
Section 103021A: Saturday & Sunday, October 30 & 31 & December 11 & 12. 9:30 – 5:00pm
Previously scheduled for September 25, 26 & October 30 & 31

Build a Dovetailed Bookcase with Mike Pekovich
 Did you hear? Books are actually cool again, and here's a nice way to show off your collection A qautersawn white oak case featuring proud dovetails and through tenons is outfitted with a pair of drawers for added storage. Wrapped cord handles give it a modern look but hammered copper pulls would look right at home on this arts and crafts-inspired piece as well. This 5-day class, led by well-known furniture maker Mike Pekovich, will take place over two weekends. In the class you'll learn efficient ways to cut dovetails and through-tenons, as well as how to construct and fit traditional dovetailed drawers. It's a lot of fun in a small package and it will definitely brighten your home. Mike is the Executive Art Director for Fine Woodworking Magazine and the author of the recently released book: The Why & How of Woodworking: A Simple Approach to Making Meaningful Work. Sign up today! Tuition: $695.00 Plus materials
Section 100618A: Saturday, Sunday & Monday, October 6—8 and Saturday & Sunday November 3 & 4, 9:30am—5:00pm
general tool list (will open in a new window)
Unique & Creative Surfaces with Tim Coleman
 Join nationally known furniture maker, Tim Coleman for this fascinating look into various techniques to create visually exciting textures and patterns to furniture surfaces. In this class with Tim students will explore two primary techniques to embellish surfaces with patterns and texture using a few simple tools and a scroll saw.
Steel stamps are commonly used to emboss leather, but they can also be used on wood. In this two day class you will learn how to use a V carving tool to make pattern outlines, and steel stamps to create texture. Try out traditional letter and number stamps and also learn to make your own shapes and symbols from steel rod stock. Stamping is easy to learn and allows you to work quickly and spontaneously. You will also learn techniques to add color to the patterns to make them really stand out. 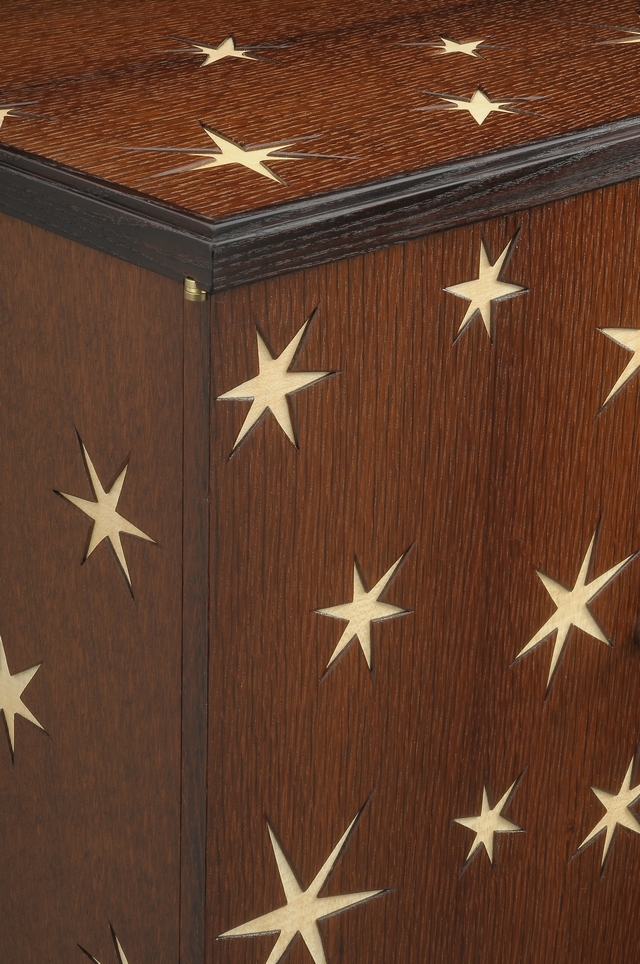
In the second part of the class you will learn how to cut shapes and patterns piercing through thick veneer pieces and then prepare them to laminate onto a contrasting layer of wood or veneer. You will get practice on the scroll saw and, most important, you will learn techniques for gluing down the cut pieces to achieve a clean result with very little glue squeeze out. It’s surprising how much depth can be achieved with material as thin as 1/16th inch, and effects can range from subtle to wild depending on wood and pattern selection. Tim Coleman works out of his shop in Shelbourne, Massachusetts and produces some truly unique and striking custom furniture for clients. In this class you can come with your own pattern ideas or look into Tim’s catalogue of ideas for inspiration. Whatever you do you will be sure to bring away some new skills and ideas that you can apply to your next projects. Sign up today- Space is limited.
Tuition $365.00 plus materials ($31.00 tax $1.97)
Section 012222A: Saturday & Sunday, January 22 & 23, 9:30am—5:00pm
Previously scheduled for December 11 & 12

Build this Small Wall Cabinet– with Kumiko Panels– with Mike Pekovich
 Join Mike Pekovich and make a great little wall cabinet in this 2-weekend class. Dovetails offer a lot of strength and some nice visual interest to the case, and Mike has some great tips for cutting accurate, stress-free joinery. The frame-and-panel door gives the cabinet it's personality and offers some solid lessons in cabinet making. You'll learn how to make, fit and hang a traditional door. In addition, you'll finish it off with a kumiko panel. This traditional Japanese latticework technique is a lot of fun and can brighten up just about any project. Mike, a long-time woodworker and instructor, is the creative director at Fine Woodworking magazine and the author of The Why and How of Woodworking, Taunton Press, 2018.
Sign up today– Mike’s classes always sell out quickly!
Tuition $545.00 plus materials
Section 022319A: Saturday & Sunday, February 23 & 24 and March 30 & 31
Carve a Newport Ball & Claw Foot with Al Breed
 There are innumerable styles of ball and claw feet found in early furniture. The most distinctive styles are generally associated with New York, Boston, Philadelphia and Newport. They were all based on a stylized Chinese dragon’s foot and the most lifelike and distinctive of all is the ball & claw that originated in Newport, Rhode Island. Among the Rhode Island examples, the carvings from John Townsend are the most dynamic and expressive in their execution and design. In this two-day hands on class we will carve a Townsend example from an early high chest that once belonged to an early governor of Connecticut.
Al Breed is a leading expert on the history and construction of Newport Style furniture and works very closely with such distinguished institutions as the Boston Museum of Fine Arts and the Yale Art Gallery. He has written numerous articles for Fine Woodworking Magazine. Al is also a recipient of the SAPFMM Cartouche award and runs his own school in Southern Maine.
Don’t miss this unique opportunity to learn from one of our country’s leading experts. There are a number of carving tools that you will need to bring with you. That list is on the school website www.schoolofwodworking.com.
Sign up today, space is limited. Tuition: $345.00 plus materials
Section 030219A: Saturday & Sunday, March 2 & 3, 9:30am – 5:00pm
Build a Gerstner Style Tool Chest with Bob Van Dyke & Tim Spratlin
 The longer you are a woodworker the more tools you accumulate- That is just one of those little-known laws of nature! They are usually not large tools – How many small tools have you acquired in the past 5 years? Lots- right? These are the hardest tools to store and keep track of. The Gerstner machinist tool chest meets this need with lots of small drawers to safely store those frequently used essential tools. The Gerstner tool chests- built in America since 1906, are the classic box for machinist and woodworkers alike. We thought it would be fun to offer this chest as a class. The construction is surprisingly simple- all tablesaw joinery with finger joints and locked rabbets for both the case and the drawers. To maximize drawer space the original tools chests featured felt covered steel drawer bottoms. This is a truly practical tool chest designed for the maximum storage space and strength.
We will build the pictured chest in your choice of ¼ sawn white oak or mahogany- the two most common species of original Gerstner boxes.
Join Tim Spratlin and Bob Van Dyke for this new night time class and build this welcome addition to your shop. Face it – it won’t solve your tools storage problems unless you stop buying tools (don’t be ridiculous!!) but it will be a fun project. Sign up today. Your species choice- white oak or mahogany- must be specified when enrolling in the class. Tuition: $345.00 plus materials
Section 020619A: Wednesday evenings, February 6 – March 20, 6:00pm – 9:30pm

general tool list (will open in a new window)
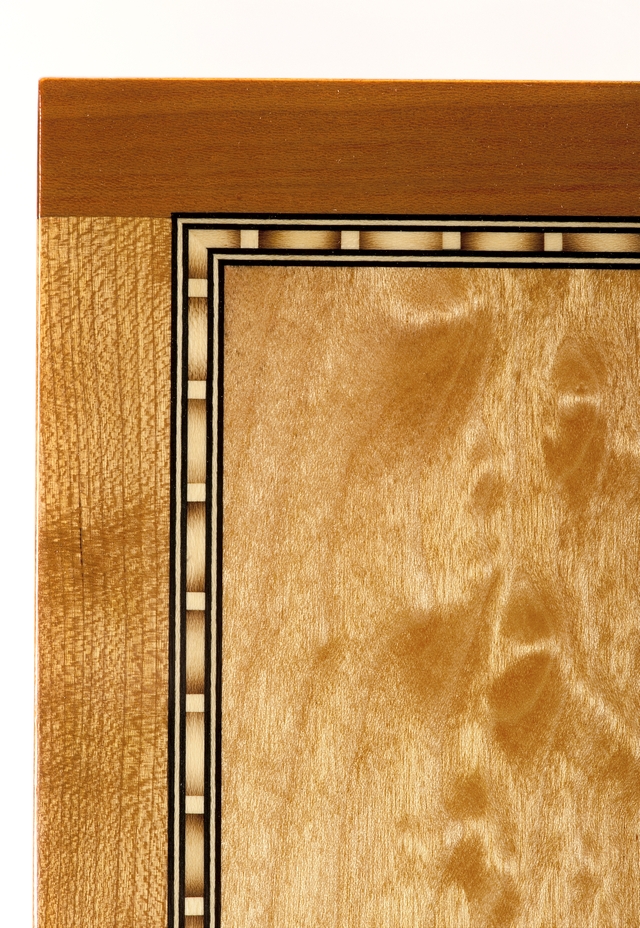
The Basics of Using Veneers and Inlaid Bandings— Build a Veneered Box with Bob Van Dyke
 If you have ever done any re-sawing then you know how cool a book matched panel can be. When you incorporate veneers into your work the possibilities for creating spectacular patterns are almost endless! Bookmatching is the simple one- but what about radial matching or parquet? In this hands-on class students will each make a small “Miter Fold” box out of walnut or tiger maple- but before doing that we will explore the endless possibilities of working with veneer to create a striking top for the box. Many veneers require a border to protect the delicate edges- so as a bonus we will explore a little inlay work and make a few different decorative bandings.
We will get into basic techniques for working with the veneers- Flattening them, buying & storing them and how to work with them to create tight, almost invisible seams. We will go into the basic tools & supplies needed along with discussing the various adhesives and ways to clamp up the veneered panel. Incorporating veneer designs into your work will open up possibilities that you may never have dreamed of. Sign up today- this is a great class and you will make a great little box to hold all your treasures!! Sign up today- space is limited. Tuition: $365.00 plus materials ($46.00 + tax) 
Section 101022A: Monday & Tuesday, October 10 & 11, 9:30am—5:00pm (Columbus day Monday)
Call 860.647.0303 to sign up for any class on this website
general tool list (will open in a new window)
No– Your tablesaw is NOT trying to kill you! Getting More from your Tablesaw Than you ever Thought was Possible– with Bob Van Dyke
 The tablesaw is one of the most basic and common shop machines in use– but it is it is frequently misunderstood and it is rarely used to its fullest potential.
In this unique demonstration Fine Woodworking Magazine Author & Director of the Connecticut Valley School of Woodworking, Bob Van Dyke will begin with a review of basic techniques and concepts for safe and effective use of this shop workhorse. Bob will go on to concentrate his demonstration on the many uses of a little known tablesaw fixture called an “L” fence. With this simple and ingenious jig, tasks such as cutting any angle at all, flush cutting to a pattern and cutting concentrically larger or smaller shapes become safe, accurate and incredibly easy.
We will examine the many practical applications for these unique techniques and then go on to explore techniques for cutting accurate shoulders on curved furniture parts, simple techniques to cut angled tenons and safe and efficient ways to cut bevels on large panels without getting any burning.
Bob's presentation assumes a working knowledge of the tablesaw and will focus on techniques specific to furniture making. This is not a beginning tablesaw demonstration!
This comprehensive demonstration will leave you wondering -“It is so simple! Why didn't I think of that!”
Tuition: $85.00
Section 120619A: Friday, December 6, 9:30am - 12:30pm
Cutting Japanese Joinery by Hand with Andrew Hunter
 Take the plunge and begin to learn about Japanese Joinery- done completely by hand. Japanese furniture joints- and most Oriental joinery, is seemingly complex but under Andrew Hunter’s careful guidance you are assured of getting on the right road to learning some intriguing and fascinating furniture joints. You will begin this series with a Japanese scarf joint. This blind dadoed, rabbeted and keyed scarf joint is a mouthful to say, but with a little guidance even a beginning woodworker is capable of making one. Known as a Kanawa tsugi, it has been used in Japan for centuries to splice together two beams, creating a single, longer beam capable of sustaining multi-directional forces. For this class, the Kanawa tsugi is a great way to develop your skills as a woodworker.
Each student will make their own two-part joint entirely with hand tools. First, you will learn how to layout the joint using a center line as a reference plane, a method that allows irregular shaped members to be seamlessly fit together. Next, you will saw, chop and pare to the lines. Then, assuming the critical first steps are correct, assembly should be a breeze and the tapered pin drives it home.
Andrew will have some of his own Japanese tools for students to try or you can bring your own. The school’s Western style hand tools are also available, and this is a great opportunity to try both Western & Japanese tools to do the same jobs. Whichever tools you choose, Andrew will broaden your understanding of how to use them correctly and efficiently. He has been building furniture by hand for over 20 years and is passionate about encouraging people to strengthen their building skills and cultivate an appreciation for the craft of woodworking. Sign up today for this truly unique and challenging class.
Tuition $295.00 plus materials
Section 121419B: Saturday & Sunday, December 14 & 15, 9:30am – 5:00pm

Cutting & Working with Your Own Veneers with Tim Coleman
 Join nationally known furniture maker, Tim Coleman for this fascinating look into the techniques used to create visually exciting textures and patterns by using veneers that you have cut yourself.
Shop-sawn veneer offers many design and construction possibilities that the thinner commercial veneer cannot. Learn how to make your own veneer using the bandsaw. Do you have a board with incredible figure- and wish you had enough to build something with it? What about stretching that board by cutting it into consecutive leaves of 1/16th inch veneer?
In this weekend hands-on class students will learn how to set up the bandsaw to cut accurate veneers. As importantly, Tim will introduce participants to the different veneer substrates and edge banding techniques along with the advantages and disadvantages of each. Adhesives play a big part in working with veneers, so this will be covered, along with the different ways of sequencing sheets of veneer to create dramatic effects and design. You can’t learn effectively by just watching a series of demos- so students will practice the techniques by making a tray- or a wall hanging- of their own design. Those of you who took Tim’s earlier class on surface ornamentation could combine effects for an over the top panel!
Tim Coleman works out of his shop in Shelburne, Massachusetts and produces unique and striking custom furniture for clients and exhibition. In this class you will develop the skills- and the ideas for different designs that you can begin applying to your next project.
The sky is the limit so join furniture maker, Tim Coleman for this unique class and learn how to use thick veneer to create decorative effects for furniture, boxes, picture or mirror frames.
Sign up today.
Tuition: $295.00 plus materials
Section 072019A: Saturday & Sunday, July 20 & 21, 9:30 am – 5:00pm

Veneering on Curved Parts with Darryl Keil
 In this exciting new class with nationally known veneer expert, Darryl Keil students will explore the techniques and tools needed to make curved furniture parts that showcase the use of highly figured veneers. A classic demi-lune table is the project that we will use as a vehicle to learn and practice the techniques of:
Making curved aprons using Italian bending plywood
Adding the show veneer and vertical grain cross banding to the curved aprons along with a decorative inlay to separate the two
Creating a “Sunburst” veneer pattern for the Demilune top. The sunburst veneer top will also be surrounded with a contrasting short grain border and a decorative inlay to set off the two veneer patterns. Creating the sunburst on a demilune is actually more complex than it is on a circular panel because the angles of the segments change.
We will go into handling veneers, sources for veneer, adhesives and techniques to create virtually invisible seams.
Darryl is one of this country’s innovators with working with vacuum presses. Because vacuum presses open up a whole level of advanced veneering techniques this class will also feature the full range of capabilities of using a vacuum press.
During this unique class you will be making the primary parts for a demilune table- i.e. the curved aprons and the top. It will be up to you to add the legs and back apron on your own.
Here is a class that will give you practical knowledge and experience and will open your eyes to the endless possibilities that working with veneer offers.
Darryl Keil began making furniture in 1976 after attending the Portland School of Art and was a pioneer in the application of vacuum pressing technology to the woodworking industry. As a leading expert on veneer work he serves as a technical consultant to furniture manufacturing facilities across the country. His company, Vacuum Pressing Systems, operates out of Brunswick, ME. Darryl will be assisted by his son Peter who has been taking on an increasingly responsible role in the company and expands his knowledge of working with veneers continually. Don’t miss this unique opportunity to learn from a leader in the field. Sign up today.
Tuition: $450.00 plus materials
Section 050319A: Friday, Saturday & Sunday, May 3 – 5, 9:30am – 5:00pm
Mastering those “Oddball” Furniture Joints with Steve Latta
 When considering how to move your skills down the road, the projects you choose should offer challenges that make you pause. In this class, we will look at several traditional forms of joinery that take more than a look or two to sort but, nonetheless, should be a part or your arsenal. We’ll tackle rule and knuckle joints, breadboard ends and their specific applications, draw-boring and some carcass specific joints such as dovetail and dado joints and how to easily incorporate dust panels. You will end the weekend with a handful of mock-ups and the knowledge to do them again. This is a great course that will broaden your work possibilities. Steve Latta is one of the premier furniture makers and instructors in the country. He is a Contributing Editor for Fine Woodworking Magazine and has taught many successful classes here at CVSW. Sign up today! Space is limited. Tuition: $365.00 plus materials ($30.00 plus tax)
Section 021823A: Saturday & Sunday, February 18 & 19, 9:30am - 5:00pm 

General tool list (will open in a new window)
Call 860.647.0303 to sign up for any class on this website
Master SketchUp in a Weekend, with David Heim
![]()
With SketchUp, you “build” furniture in the computer piece by piece. So, when it’s time to build in the shop, you can work faster and smarter, with fewer costly mistakes. This intensive two-day class will give you plenty of hands-on experience with this powerful, versatile 3D design program.The Saturday session will introduce you to the basics: How the SketchUp tools work and good practices to follow to work quickly and accurately. The Sunday class covers techniques and tools for creating fully detailed and measured drawings. You’ll spend the day creating models. These exercises will give you the knowledge and confidence to make your own original furniture designs.
Bring a laptop computer (Mac or Windows) loaded with the version of SketchUp called SketchUp Free. To get it, go to https://www.sketchup.com/plans-and-pricing/sketchup-free. Click on the “start modeling” button. (Don't forget to bring your power cord!!)
Tuition $365.00 materials are included
Section 101522B: Saturday & Sunday, October 15 & 16, 9:30am - 5:00pm
Call 860.647.0303 to sign up for any class on this website
An Introduction to Inlay with Steve Latta
 Inlay is a technique missing from many folks’ arsenals of skillsets. A little bit of inlay can go a long way in taking a casual piece to something far more formal and sophisticated- or it can just make it more interesting and fun. In this hands on class, nationally recognized furniture maker and inlay expert, Steve Latta, will present an overview of both traditional and contemporary inlay techniques, using both hand and power tools. This is a hands on class so you will have plenty of opportunity to practice with both techniques. You’ll walk away with an understanding of traditional stringing and inlay and be ready to experiment with adding rich accents to your work, be it a table top, drawer front or a simple decorative panel. This is a great class if you have never done any inlay but even if you have been working and experimenting on your own you owe it to yourself to study with one of the best instructors in the country. Sign up today- You do not want to miss this opportunity. Some specific tools are suggested or required. Please check the PDF below. Sign up today! Tuition: $295.00 plus materials
Section 031420A: Saturday & Sunday, March 14 & 15, 9:30am—5:00pm
Learn to Carve Moldings with Mary May
 Carved moldings are an important of traditional furniture and can be a fun and unique embellishment for contemporary furniture and any number of woodworking projects. Learn from the best as Mary teaches you how to carve miles of moldings in a fun weekend class. Nationally known carver Mary May will teach you effective methods of how to lay out a design along a length of shaped molding, and how to carve bead, rope, egg and dart, gadroon, and leaf moldings. She will share tips and tricks of how to get into "production mode" where you can carve these architectural features quickly and efficiently. Opened to beginning and experienced carvers. During this class, Mary will also show how to get your tools razor sharp, techniques of carving in the correct grain direction, carving safety, and as many carving tips and tricks as she can jam into two days of hands on carving practice and instruction. It's going to be a lot of fun, so don't miss out! Mary is one of the premier carvers in this country and her classes are always great! Sign up today.! Tuition: $345.00 plus materials

Section 030720A: Saturday & Sunday, March 7 & 8, 9:00am—5:00pm
![]() Tool_list_Mary_May_Carving_Moldings.pdf
Tool_list_Mary_May_Carving_Moldings.pdf
Router Madness with Bob Van Dyke
 The router is one of the most versatile power tools in the shop but many people utilize only a fraction of its actual capabilities. Most beginners think of the router for rounding over or chamfering edges of a board but with some understanding of how things work and a little imagination the router can be used for accurate mortises, tenons, dadoes, raised panel doors and more! In this daylong class of demonstrations, Fine Woodworking Magazine Contributing Editor Bob Van Dyke will explore the capabilities of routers, the many different kinds of routers, what features are important and what are not. We will get into the many different types of router bits available and what to look for. Router tables are a big part of router work and we will explore the many different options, including Bob’s “$15.00 router lift”! Don’t miss this opportunity to really understand how this important tool works. Tuition $125.00
Section 012520A: Saturday, January 25, 9:30 am—5:00pm
Building a Windsor Chair : A Comprehensive demo by David Douyard
 Building a Windsor chair can be daunting to those new to the craft, but with a bit of exposure, inspiration can replace hesitation and get you on your way to building comfortable, durable and beautiful chairs.
This two day seminar will focus on many of the varied skills that go into producing a classic Windsor chair. From splitting the log, shaving the parts, steambending, turning, joinery, carving and finishing, you’ll watch as well-known Connecticut chair builder David Douyard constructs a classic Sack-back Windsor chair. David will explain the process as he goes and answer the many questions that always come up. Come with an open mind, a notebook and a camera to catch all the action. We are scheduling a weeklong Windsor class summer 2020 where each participant will make their own Sackback Windsor chair. This demo weekend is a great introduction to that weeklong class. Either way– Don’t miss it! Sign up today! Tuition $275.00– Materials are included
Section 022920A: Saturday & Sunday, February 29 & March 1, 9:30am—5:00pm
All-in-one Dovetail Station with Mike Pekovich
 Come for the weekend and build a small version of what is affectionately known as a "bat house" at CVSW (where did that name come from???). If you have cut dovetails at the school you've probably used one to rout the waste between the pins on the dovetails. While that task alone makes it worthwhile to make one, it can also handle just about every other work holding dovetail task you can think of. From holding the stock upright for sawing to securely holding the stock for chopping, this fixture will help make the job easier. If you're lacking a work bench you can just clamp it to a table and you're ready to go. From marking and sawing, to routing and chopping, the dovetail station has you covered. We'll spend the first day making it and the second day learning how to put it to use to cut dovetails better than any you have ever thought you could do. Sign up today. Space is limited.
Tuition: $365.00 plus materials
Section 042322A: Saturday & Sunday, April 23 & 24, 9:30am – 5:00pm
Call 860.647.0303 to sign up for any class on this website


General tool list (will open in a new window)
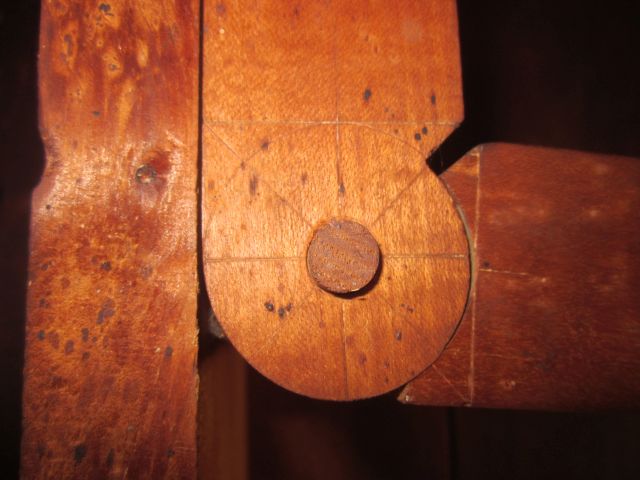
Learn the Traditional art of Seat Weaving with Sue Muldoon
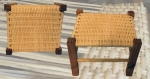 Explore the art of seatweaving in this new two-day hands on class. Contrary to popular belief, it is not a “dying art”! Bringing old or new chairs to a sittable state can be achieved with a variety of different weaves and that is what this class is all about.
We will begin with some history of cane, rush, wicker and a wide assortment of seating styles. On your first day, you will choose to weave a small stool using either fiber rush or porch weave. Learning these two techniques opens the doors to many variations using the same weave technique but moving on to different materials of your choice. Imagine all the “sad chairs” that you pass by that could be revived or family heirlooms to be restored or new chairs woven.
On the second day, you will learn the traditional 7-step hand-woven cane
(also called lace cane) on your own chair, or you may choose from a selection in Sue’s inventory for a small fee. Chairs should be in a finished state, as caning is the last step to a complete project.
Caning kits with cane, awl, booklet and wooden pegs will be available. We will need measurements of your chair 2 weeks prior to class to assure the correct size of cane.
No experience is necessary. You will have your hands in water for soaking cane, fiber and reed.
Sue Muldoon is a seatweaver (among other things) and owns Redux For You, repairing chairs and memories . She has taught hundreds students over the past several years and is looking forward to sharing her skills. 
Tuition: $365.00 plus materials (paid directly to instructor)
Section 092422B: Saturday & Sunday, September 24 & 25, 9:30am - 5:00pm
Call 860.647.0303 to sign up for any class on this website
Making Shaker Oval Boxes with Doug Smith
 Shaker Oval boxes are a rewarding project that do not take a huge amount of time, equipment or experience and are a lot of fun to make.
Doug Smith of Douglass Yankee Craftsman will spend two days teaching you the traditional Shaker technique of making fine Shaker Oval Boxes. In this two day beginning class each participant will make a number one, number two and number three Shaker Oval box. Two boxes will be made with cherry bands, one with a cherry top and the other with a lace wood top. The third box will have maple bands with a birdseye maple top. You will learn how to hand carve the swallow tails, select the bands and secure them with the traditional clinch nails. One of the most interesting parts of the class is the steaming and bending of the wood to fit around the forms. Fitting the tops and talking about finish will round out your two days of rewarding fun. Sign up today- Space is limited. Tuition: $365.00 plus materials.
Section 012321B: Saturday & Sunday, January 23 & 24, 9:30am – 5:00pm
Carve the “Green Man” with Mary May
 Have you ever seen those faces with the leaves flowing from them? Pretty cool- aren’t they?? Join professional woodcarver, Mary May, in carving the traditional Greenman. You don't need any carving experience for this class, as Mary will walk you through every step from start to finish. She will show you how to carve challenging facial features and curling, overlapping oak leaves. Bring a mirror so you can carve a self-portrait greenman!
Sign up soon- space is limited to 8 students. Tuition: $525.00 plus materials
Section 042123A: Friday—Sunday, April 21—23, 9:00am—5:00pm
Call 860.647.0303 to sign up for any class on this website
Build an Arts & Crafts Inspired Bookshelf with Mike Pekovich
 Did you hear? Books are actually cool again, and here's a nice way to show off a small part of your collection. This compact bookshelf can sit on your desk or hang from a wall and it turns any space into your personal library. Rustic white oak and exposed joinery give it an Arts & Crafts feel with storybook charm. We'll even add some simple chip carving to finish off the project and add a new skill to your toolbox. In this two-weekend class led by Mike Pekovich, you'll learn efficient ways to cut dovetails and through-tenons, as well as how to construct and fit drawers. It's a lot of fun in a small package and it will definitely brighten your home. Sign up today- Class is limited to 8 participants. Don’t miss it!
Tuition $695.00 plus materials
Section 051521A: Saturday & Sunday, May 15 & 16 & June 5 & 6, 9:30am – 5:00pm
general tool list (will open in a new window)
Introduction to the Art of Kumiko with Mike Pekovich
 Are you looking to spice up your work in a novel way? Then you need to sharpen your chisels and try your hand at kumiko. This Japanese latticework technique is traditionally found on shoji screens but is making its way into contemporary furniture and boxes. The elegant geometric patterns of kumiko begin with a simple half-lap grid. From there each square is filled out with small, precisely beveled parts until the pattern emerges.
In this 3-day weekend class you'll start by building a pair of mitered boxes, where you'll learn how to work safely and accurately with small parts at the tablesaw. After that, you'll learn to make two different traditional kumiko patterns that you can use to top off the boxes. Most students come away with two completed boxes at the end of class (just in case you still need to check off some holiday gifts!).
Sign up today! Space is limited
Tuition: $495.00 Plus materials ($80.00)
Section 121721A: Friday – Sunday, December 17 – 19, 9:30am – 5:00pm
General tool list (will open in a new window)
Figuring Out Moldings with Chuck Bender
 Sometimes you look at a molding on a piece of furniture and you wonder– How could I possibly make that with the tools I have? You would be surprised how many different complex molding profiles are within your grasp using just a router table, stock router bits and a table saw.
Moldings make an otherwise ordinary piece of furniture special. With a little creativity, you can make the exact shape and size molding you need and want.
In this two-day class, Chuck Bender walks you through a series of progressively more elaborate moldings using stock router bits and standard woodworking power tools. This is a hands on class. You will be making some molding profiles that you can then bring home to duplicate in your own shops. Don’t miss this unique and informative class. Chuck Bender is a superb furniture maker, runs his own furniture making school in PA and is the 2022 SAPFM cartouche award recipient. Sign up today.
Tuition: $365.00 plus materials
Section 030522A: Saturday & Sunday, March 5 & 6, 9:30am—5:00pm
General tool list (will open in a new window)
Beginning Basic Decorative Bandings with Bob Van Dyke
![]() In this one-day class, CVSW school director and Fine Woodworking Magazine Contributing Editor Bob Van Dyke will demonstrate a number of increasingly complex decorative bandings. These bandings were employed extensively in the furniture of the Federal Period and they lend a distinction and uniqueness to almost any woodworking project. Historically, many of these bandings were actually a two-dimensional version of Queen Anne style three dimensional carvings. Regardless of the background- or the complexity, the question still remains- How are these things made? No- no one is gluing in tiny little pieces of wood with a tweezers and magnifying glassy! Like anything, it is a process- sometimes simple and sometimes incredibly complex! We will explore a number of different styles- including sand shaded bandings – a process that adds an incredibly three-dimensional quality that involves scorching parts in hot sand. Most of the basic processes were learned from inlay and bandings expert Steve Latta while others come from study and experimentation. Don’t miss this opportunity to expand your repertoire and learn a fascinating process! Sign up today- space is limited. Tuition: $145.00 materials are included.
In this one-day class, CVSW school director and Fine Woodworking Magazine Contributing Editor Bob Van Dyke will demonstrate a number of increasingly complex decorative bandings. These bandings were employed extensively in the furniture of the Federal Period and they lend a distinction and uniqueness to almost any woodworking project. Historically, many of these bandings were actually a two-dimensional version of Queen Anne style three dimensional carvings. Regardless of the background- or the complexity, the question still remains- How are these things made? No- no one is gluing in tiny little pieces of wood with a tweezers and magnifying glassy! Like anything, it is a process- sometimes simple and sometimes incredibly complex! We will explore a number of different styles- including sand shaded bandings – a process that adds an incredibly three-dimensional quality that involves scorching parts in hot sand. Most of the basic processes were learned from inlay and bandings expert Steve Latta while others come from study and experimentation. Don’t miss this opportunity to expand your repertoire and learn a fascinating process! Sign up today- space is limited. Tuition: $145.00 materials are included.
Section 102222A: Saturday, October 22, 9:30am – 5:00pm
Call 860.647.0303 to sign up for any class on this website
Classical Chinese Furniture– The Roots of Western Furniture– with Andrew Hunter
 The Ming Dynasty (1368-1644) was a bright point in China's long history, where arts and culture reached a pinnacle of taste and style. The furniture that came out of this era is some of the finest the world has ever known. Yet, to many, in the West traditional Chinese furniture is relatively unknown. Graceful designs, superlative material and fine craftsmanship are defining elements of this style.
Professional Furniture maker and educator, Andrew Hunter will spend the day discussing the history of furniture making in China with an emphasis on what made Ming style or Classical Chinese furniture so special. This lecture-based class will begin with an introduction to furniture making in China and the history that led to it's refinement. We will also investigate the influence classical Chinese furniture has had on modern furniture designs from Queen Anne to Mid-century modern. And of course, we will examine the intricate joinery that held it together for all these years! So join us for this unique opportunity to learn something new. Tuition: $145.00 Materials are included
Section 050723A, Sunday, May 7, 9:30am - 5:00pm
Call 860.647.0303 to sign up for any class on this website

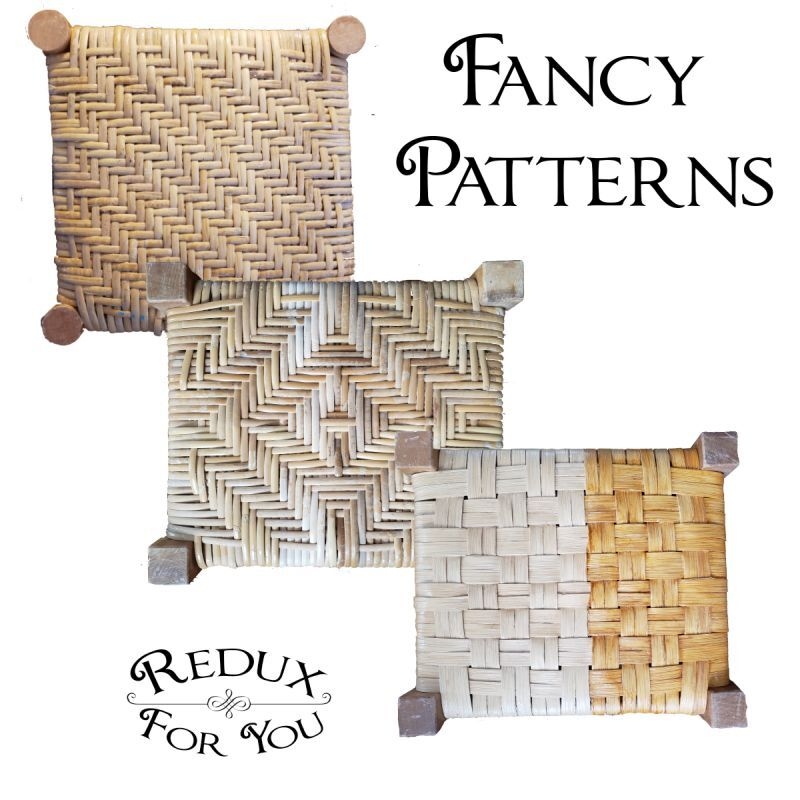
Fancy Patterns in Seat weaving with Sue Muldoon
Up your pattern game! Learn 3 new patterns with reed or cane: Basketweave, Herringbone and Diamond pattern. We will learn & practice the patterns on simple stools (part of your materials fee, but these patterns can be done on any chair with 4 rails, or that special furniture piece ! Headboards, room dividers…learn the patterns then apply them to a project of your choice. We will discuss how to fill in the “gussets” on a trapezoidal chair and options for using other materials in future projects. Don’t miss this exciting opportunity to learn some new techniques and put your imagination to the test! Sign up today- space is limited. Tuition: $365.00 plus materials (paid directly to the instructor)
Section 111222B: Saturday & Sunday, November 12 & 13, 9:30am – 5:00pm
Call 860.647.0303 to sign up for any class on this website
Make a Cracked Ice Parquet Tabletop with Tim Coleman
 This new weekend class with well known Furniture maker Tim Coleman encourages students to jump into the exciting world of making dynamic patterns using shop-sawn veneers. We will create a parquet veneer tabletop using your choice of the Cracked Ice pattern or a Ribbon pattern design. The Cracked Ice pattern is seen widely in Chinese design and is a great way to learn parquet veneer techniques. The Ribbon pattern utilizes the natural chatoyence inherent in most figured woods and offers some phenomenal design opportunities. Tim will begin by showing examples of these pattern in his own work and. Due to the logistical constraints of the two day format, Tim will wait until the second day to offer students strategies for creating their own patterns.
Students will work with thick veneer provided by Tim and each will lay out and construct their own cracked ice or ribbon pattern. Most students will have their panels in the veneer press by the end of the first day so that they are ready for scraping, sanding and edge banding the next. We will endeavor to have students leave with a completed tabletop but please realize you may still have to do some finish work at home before beginning the finish process. The panel you make in class would make a great top for a table or maybe just a panel ready to hang on the wall. Either way you will learn a whole lot of new & creative skills.
Topics will include:
- Working with thick veneer
- Creating parquet patterns
- Veneer substrates
- Veneer pressing techniques
- Edge banding techniques
- Adhesives for veneer work
- Shooting veneer edges with a hand plane
- Scraper sharpening and use
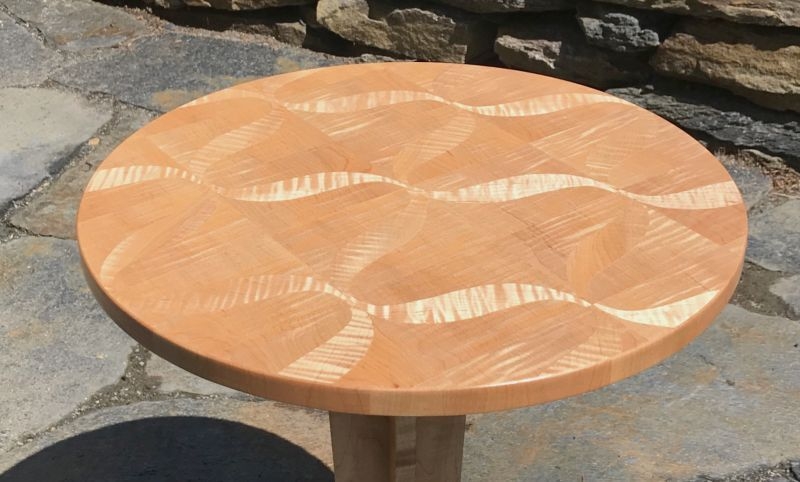
Sign up today- Space it limited to 8 students. Tuition: $395.00 plus materials
Section 031823A: Saturday & Sunday, March 18 & 19, 9:30am – 5:00pm
General tool list (will open in a new window)
Call 860.647.0303 to sign up for any class on this website
Introduction to Marquetry with Frank Strazza
Learn to paint with wood
 Marquetry involves carefully cutting and piecing together different wood species, creating a beautiful picture, decorative element, or lettering. Dating back to the Italian Renaissance, marquetry has traditionally been used to embellish furniture, church pews, and panels in homes and palaces. Its styles and techniques have evolved over the centuries as the craft spread across the globe.
In this 2 day introductory class, Frank will teach you some of his favorite techniques and methods, including packet cutting and double-bevel sawing, as you discover that you, too, can create this timeless art.
You will learn how to create your own veneers, which tools to use to create the marquetry. We will do some simple designs including some floral work and lettering. You will leave with the knowledge to go home and delve into this craft and hopefully with the thirst to learn more!
Don’t worry if you are not “artistic”; Frank will guide you through the process, unlocking many possibilities, but if you are an artist, please come prepared to think outside the box! Sign up today! Class is limited to 8 students. Tool list will be available in January. 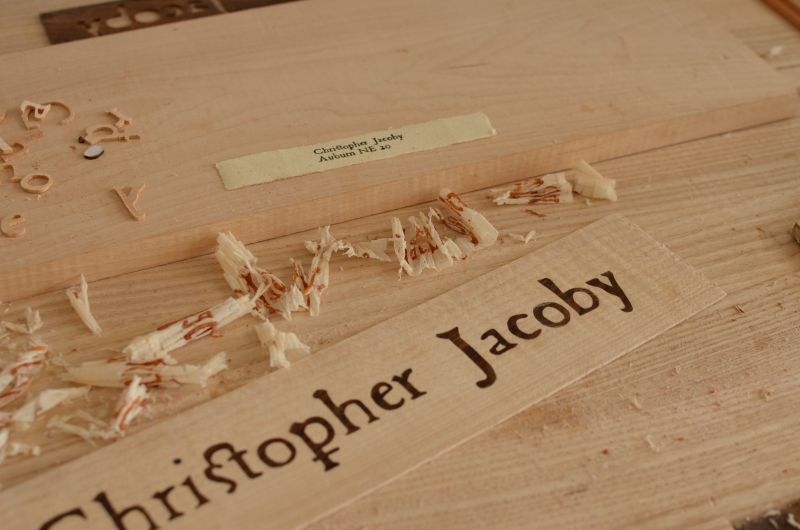
Tuition: $425.00 plus materials
Section 060323A: Saturday & Sunday, June 3 & 4, 9:30am – 5:00pm

Call 860.647.0303 to sign up for any class on this website
Learn to cut Houndstooth Dovetails with Frank Strazza
 In this two-day class Frank will guide you through the process to create his signature houndstooth dovetails. You may have seen Frank’s dovetails on the cover of a recent Fine Woodworking Magazine, however, there is no substitute for in-person instruction. Frank will guide you through the subtleties & complexities of creating this unique and distinctive joint. From methods of sawing and chiseling to layout and fitting you will get plenty of hands on practice.
Frank will begin the class with sawing exercises which is really the key to success in any handcut dovetail joinery. Guiding you through the process, from careful layout to sawing, then on to correct chiseling techniques.
This joint is both beautiful and structural and can be used in everything from bench construction to drawer sides.
Sign up today! Class is limited to 8 students. Tool list will be available in January
Tuition: $425.00 plus materials
Section 060123A: Thursday & Friday, June 1 & 2, 9:30am – 5:00pm 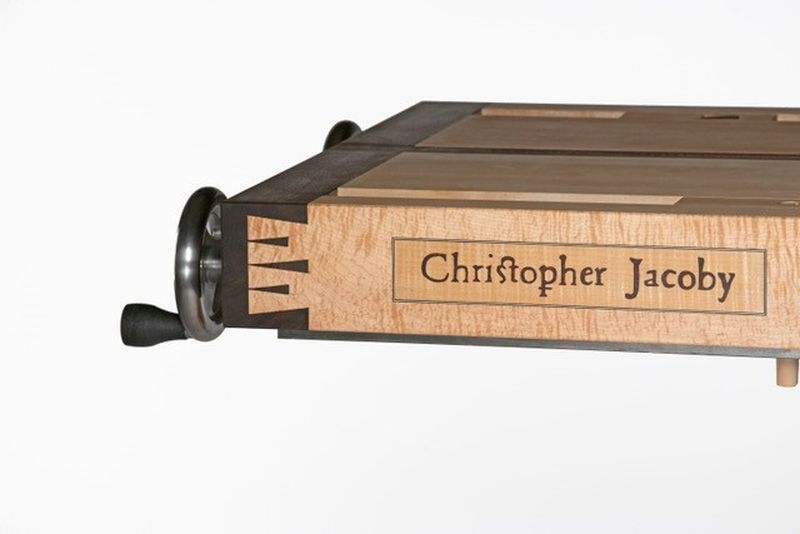
Call 860.647.0303 to sign up for any class on this website
Step One: A Simple Plant Stand
 The focus of this class is on safety and on using tools that don’t cost a fortune and are readily available just about anywhere.
We will discuss which basic tools you will need, simple measuring and marking techniques, how to size parts accurately with a chop saw and how to work with a router and bandsaw. Unlike more advanced classes we fully expect that you will have this project finished at the end of the weekend. Plan on getting a coat of milk paint on your stand- so start thinking about what color you would like to go with. The pictured plant stand is similar to what we will be making in class. This is a new project so we do not yet have any photos- but rest assured- This plant stand will look great in your home and building it will teach you plenty about beginning woodworking techniques.
Sign up today. Class size is limited to 8 students.
Tuition: $365.00 plus materials
Section 052023A: Saturday & Sunday, May 20 & 21, 9:30 am – 5:00pm
Call 860.647.0303 to sign up for any class on this website
Beginning Furnituremaking: Walnut Jewelry Box

A hands-on course that covers the basic concepts of woodworking and furniture making. Start building the foundation which is necessary to learning the processes and techniques of making solid wood furniture. This eight-session (or 2 weekend) class is a combination of demonstrations and hands-on practice. General shop safety is emphasized as students learn and practice the process of milling solid hardwoods and the importance of the three stationary tools that form the backbone of any modern furniture making shop- the tablesaw, the jointer and the thickness planer. In addition to learning the safe & effective use of these mainstays, students will also begin to develop their skills with certain handtools and start to appreciate how they complement and finish the job begun with the major shop power tools. The project in this class is a solid walnut jewelry box which utilizes all the basic tools & skills needed to begin making other furniture projects. Equipped with these basics, students can begin their rewarding journey to taking on more challenging projects in other classes and in their own shops. This class is the required prerequisite for Furniture Making II. Class size is limited to 10 students. Tuition: $595.00 plus materials ($59.00)
Section 022523A: Saturday & Sundays, February 25, 26 & March 11 & 12, 9:30am—5:00pm
(This class is a required prerequisite for other classes in the "Fundamentals of Furniture-making" series (Furnituremaking II & III) and has always proven worthwhile to beginner and advanced students alike. IT IS NOT A PREREQUISITE FOR ANY OTHER CLASSES ON THE SCHEDULE)
Call 860.647.0303 to sign up for any class on this website
General tool list (will open in a new window)
Make an Arts and Crafts Style Glass Front Bookshelf with Bob Van Dyke & Tim Spratlin
 This advanced workshop features a handsome frame and panel book shelf made in mahogany The design is loosely based on those made famous by Gustav Stickley and Harvey Ellis in the early twentieth century. Glass paneled doors, wedged through mortise and tenon joints and traditional Arts & Crafts style hardware are only a few of the distinctive features of this new project. This class will be a great learning experience because it is a new project and participants will see and be a part of all the problem solving that goes into any furniture-making project. The prototype bookshelf is in the works now and can be seen at the school. As with any new project, we can only estimate the number of nights the class will require. Woodworking II or Fundamentals of Furniture Making is required. Tuition: $575.00 (plus materials)
Section 091508: Monday evenings, September 15 – December 22,
6:00pm – 9:30pm
Woodworking III
| Woodworking III level classes feature a variety of more complex projects. Students are expected to complete some basic work at home such as scraping, sanding and dry-fitting, thus leaving more actual class time for the more complex operations. Shop time for this handwork only can be arranged if you have no facility to work at home. | ||
Make a Shaker Candle Stand Table with Bob Van Dyke

This elegant little table will fit just about anywhere in your home and is a lot of fun to build.
The table features a graceful turned center column (the turning will be done prior to class- so don’t worry if you do not know woodturning) with three gracefully curved legs. The 18” diameter top is thin and has a nice curved under bevel around the edge.
You will have your choice of cherry or walnut- both look great!
The legs are joined to the center column with hand-fitted sliding dovetails. Get your handplanes sharpened up because you will need them to flatten the top and to taper the legs. Lots of fun and very rewarding! One of the best parts of this class is that the table is small so the materials charge won’t break the bank! This class is over two weekends so there will be plenty of time to work on any surfacing and sanding that you might not get done in class.
Tuition: $445.00 (plus materials)
Section 050711A: Saturday & Sunday, May 7 & 8 and June 4 & 5, 9:30 - 5:00pm
general tool list (will open in a new window)
Shaker Wall Clock with Bob Van Dyke & Tim Spratlin
 This 10-session (approximately) class continues the Fundamentals of Furniture-making series and concentrates on carcase construction while allowing you to refine your woodworking skills. Building the Shaker style wall clock (in cherry or walnut) emphasizes the use of handtools in fitting joints, creating a glass like surface on the wood and beveling the bookmatched back. Students will learn more advanced techniques including resawing, bookmatching, handfitting hinges and precise joinery techniques. You will have your choice of standard quartz movement or the more traditional (but more expensive!) mechanical movemnet. Tuition: $445.00 plus materials.
Section 011320A: Monday evenings, January 13 - March 30, 6:00pm - 9:30
Make a Craftsman Style Blanket Chest with Bob Van Dyke & Tim Spratlin
 This advanced workshop features a handsome frame and panel blanket chest with tiger maple panels and a cherry frame. It is based on a design by John McAlevey, a well-known custom furniture maker and author living in Maine. The chest was featured on the cover of Fine Woodworking Magazine a number of years ago. The project entails extensive through mortise and tenons, raised panels, chamfered legs, a number of curved parts and frame and panel construction. The techniques used in its construction are basic to many larger furniture pieces. Participants need to have taken at least the Woodworking I class or its equivalent.
Tuition: $595.00 (plus materials).
Section 020314A: Monday Evenings, February 3 - April 21. 6:00pm- 9:30pm
General tool list (will open in a new window)
Make a Craftsman Style Morris Chair with Bob Van Dyke
 The Morris chair is the epitome of Craftsman style furniture and the design we have selected offers many of the typical design features of this well-known chair. Through mortice & tenon joints, a reclining back and angled arm rests are only a few of the highlights of this unique (and comfortable!) piece of furniture. This challenging project will be done in your choice of cherry or walnut and will definitely exercise all the woodworking skills you have learned up till now. We are estimating approximately 12 sessions for this class, however; it is difficult to forecast exactly how long any advanced class will take. As with all Level III classes, some work at home (or in “off” time in the school) will be required. Participants need to have taken at least the Woodworking I and II or equivalent classes. The upholstery work for the chair is not part of the class. We can recommend upholsterers who have done nice work in the past. $495.00 (plus materials).
Section 011210A: Tuesday evenings, January 12 - April 20, 6:00pm – 9:30pm
general tool list (will open in a new window)
Bow Front Writing Desk with Bob Van Dyke & Tim Spratlin

This intermediate level class will encourage students to go beyond the "straight and square". Techniques used for creating curves, designing angled joinery and making handcut dovetailed drawers will be explored in this innovative class. The desk will incorporate a curved-front drawer, tapered legs, glue laminated curved aprons and walnut cockbeading around the drawer. This project incorporates challenging woodworking problems such as cutting the tenons on the end of a curved piece, fitting the drawer to the exact drawer opening, flattening the 22 inch wide top (by hand) and more. We solve these problems in a simple and unique way which you will be able to apply to other projects in the future. Some hand work at home will be expected. Woodworking 1 & II are required prerequisites. Don't wait too long to sign up for this class as space is limited. Some work at home will be required. Tuition: $695.00.00 plus materials
Section 032409A: Tuesday evenings, March 24 - June 16, 6:00pm - 9:30pm (This class was originally scheduled to begin on March 3)
![]() general tool list 64.98 Kb (will open in a new window)
general tool list 64.98 Kb (will open in a new window)
Tiger Maple Butcher Block Table with Bob Van Dyke & Tim Spratlin
 This new project in the “Fundamentals” series features a small cherry table with a tiger maple “butcher block” top. The table, originally designed for a kitchen, would work well as an occasional table just about anywhere in the house. The design is loosely based on some Arts & Crafts styles with an Oriental influence. The legs feature a curved reverse taper common to that style of furniture and the top is raised up off the legs to give the table a feeling of “lightness” . Another interesting (and challenging!) feature of the table is the lower shelf which is a series of slats inlaid with a walnut geometric design. This new class has just enough complexity to make it a logical choice after having taken the Shaker hall Table class. Sign up soon- space is limited. Tuition: $345.00 plus materials
Section 010609A: Tuesday evenings, January 6 – February 24, 6:00pm – 9:30pm
Make a Craftsman Style Dining Chair with Bob Van Dyke & Tim Spratlin
 A dining chair is one of the more challenging woodworking projects you can take on. The balance between making the chair as strong as possible and still maintain a lightweight and attractive design, the angles involved to make the backrest comfortable, creating the curved parts and the sheer number of mortise and tenons will exercise all the woodworking skills you have learned up till now. The chair features tapered legs and a tapered backrest. The Craftsman style utilized in the design assures that it will complement the furnishings in most rooms. As with all Level III classes, some work at home (or in "off" time in the school) will be required. The "one weekend per month" format allows us to take on this more ambitious project and allows you plenty of time in between sessions to get all of the handwork done to your satisfaction. Participants need to have taken at least the Woodworking I and II or equivalent. The upholstery work for the chair is not part of the class and will be up to you. Tuition: $595.00 (plus materials). (Note: Payment can be stretched out over the course of the class if you prefer)
Section 092609A: Saturday & Sunday, September 26 & 27, October 31 & Nov. 1, November 21 & 22, 9:30am - 5:00pm
Build a Federal Style Side Table with Bob Van Dyke
 This exciting new class features a small Federal or Hepplewhite style side table with a whole lot of challenges and a boatload of new skills to be learned. The focus of this class will be efficiency – in joinery, in ornamentation and in design. Efficiency in joinery means doing as much joinery as possible all at once and making joints that fit right off the machines. This project also features many techniques that may be new to a number of you. Working with veneer for the drawer front, dovetailing and cockbeading a drawer and adding cuff inlay and stringing to the legs, all turn a basically simple table into an heirloom piece you can be proud of. We will also be making some of the tools you will need to do the inlay work. This is a simple traditional Federal table which will fit with just about any home décor (and is small enough, 23” wide X 17” inches deep, or you can opt to do a small square table, 17” X 17”) to fit just about anywhere. Sign up soon – these are some skills you will be able to use over and over. There will be certain handwork that you may be required to complete outside of class. Please make sure you are willing to do that before signing up. This is going to be a fun class!
Tuition $595.00 plus materials
Section 012615A: Monday evenings, January 26 - April 20, 6:00pm- 9:30pm
general tool list (will open in a new window)
Make an Arts & Crafts Style Display Case with Bob Van Dyke
 This new Woodworking III class is going to be a lot of fun (and a lot of work)! Arts & Crafts Style furniture has been immensely popular. It is attractive, relatively straightforward to build and fits well in just about any house. The display cabinet we will be building was featured on the cover of Fine Woodworking Magazine Issue # 211. The cabinet, which could also be used as a sideboard, was designed by Michael Pekovich, FWW Magazine’s Art Director, and is approximately 48” wide, 38” high and 13” deep. It features leaded glass doors, through tenons and three dovetailed drawers. The preferred species for this would be quartersawn white oak, but it could also be done in in cherry or walnut if you prefer. As with any new project class the anticipated duration of the class is unsure and it may run a little longer than scheduled. There will be homework required which will consist of surfacing and dryfitting joints. If you do not have facility at home then some time in the class shop can be arranged with the director. If you are unable to commit to this homework or will be missing more than a couple of the classes then this is not the class for you. Sign up soon as I expect this class to fill quickly. Tuition $595.00 plus materials
Section 101910A: Tuesday evenings, October 19— January 25, 2011, 6:00pm - 9:30pm
This class has received such a strong response that I am creating a second section of the class which will meet on
Wednesday nights starting October 27 - January 19, 6:00pm - 9:30pm.
Creating two sections will make for smaller classes which will be more enjoyable and make it easier to complete the project in the allotted time. You can get signed up by calling 860.647.0303
Hope you can make it
(photo by Michael Pekovich: courtesy- Fine Woodworking Magazine)
general tool list (will open in a new window)
Design & Build an Arts & Crafts Style Table
 This new class gives you the opportunity to incorporate your own design ideas into a small table built in the Arts & Crafts Style. Instead of everyone making exactly the same piece, each student will work on variations of a basic theme. Appropriate tables would be a coffee table, a side table, a hall table or sofa table. This is a great opportunity to learn what goes into designing a piece of furniture. We will start the class with discussion of everyone’s ideas and then get into drawing the piece in a full size format. After the design is settled a stock list can be generated and then it will be time to get some wood cut. The deign should follow some basic Arts & Crafts design elements- you should plan on some through tenons, probably square legs and perhaps some Greene & Greene inspired details, ie. Ebony plugs, breadboard ends and maybe even a “cloud lift” detail on the aprons. All in all this should be a fun class making your own piece of furniture. Note: if you would prefer to follow a design then I will be designing a Greene & Greene inspired coffee table which you are welcome to duplicate.
Tuition: $425.00 plus materials
Section 021511A: Tuesday evenings, February 15 - May 3, 6:00pm - 9:30pm
(note: this class was previously scheduled to begin January 26)
··general tool list· (will open in a new window)
Build a Tiger Maple & Cherry Bookcase with Bob Van Dyke & Tim Spratlin

When I saw this bookcase on the cover of Fine Woodworking a number of years ago I knew that I would be doing it as a class- I just had to wait for the right time to put it on the schedule. This coming winter is that time!
Rhode Island furniture maker Pete Zuerner built this handsome bookcase in cherry and vertical grain Douglas Fir but we will be doing it a little differently in class- cherry frame and tiger maple panels- to match the Arts & Crafts Cherry & Tiger Maple blanket chest we do in class periodically.
The class will begin with milling the cherry framework and gluing up the tiger maple panels. Careful selection of stock is important to make the most of the maple’s natural figure. We will have plenty of mortice & tenon joints to cut and fit along with sizing and surfacing the tiger maple panels. Once the panels are ready we will apply finish to them before going ahead with the assembly of the case. The moldings on the front edges of the shelves and the top will be done a little differently than pictured. Adding the adjustable shelves and installing the top will make this project ready to bring home and finish. The bookcase will be approximately 65” high, 40 1/2” wide and 14” deep- big enough to store plenty of your favorite books but not so big that it will take over the room. Sign up today for this great class. Tuition $545.00 plus materials
Section 011118A: Thursday evenings, January 11—April 5, 6:00pm - 9:30pm
(image used with the permission of Pete Zuerner)
General tool list (will open in a new window)
STRICTLY BOWLS - A Woodturning Class with Rick Angus
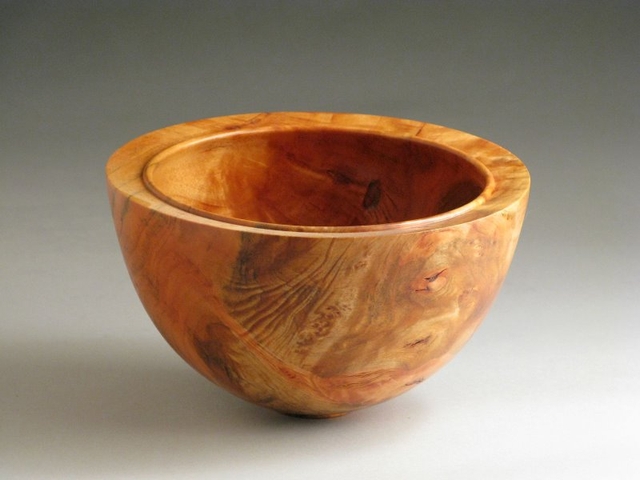
Many students have asked for a class that offers the opportunity to turn bowls and only bowls. This class is for students with some turning experience. The night time woodturning or the weekend Basic Woodturning are required. Students will have the opportunity to turn a shallow bowl, a deeper bowl, and time permitting- a third bowl or a plate (think very shallow bowl…). Participants will learn to make jigs and fixtures that will be useful in finishing the bottom of any bowl. We will get into the use of a four jaw chuck as well as alternative ways to hold the work on the lathe without using a commercially made chuck. Sharp tools are essential so we will be spending time at the grinder learning about sharpening bowl gouges and scrapers. Techniques for sanding and finishing bowls will also be covered. Sign up today. Space is limited to 9!
Tuition: $365.00 plus materials ($45.00 + tax)
Section 050623B: Saturday & Sunday, May 6 & 7, 9:30am—5:00 pm
Call 860.647.0303 to sign up for any class on this website
Learn to Turn Natural-Edge (Bark-Rim) Bowls with Rick Angus

Turning natural edge bowls from wet local hardwoods can be great fun– and the material is free (if you own a chain saw and have access to recently cut down trees….!) In this weekend class students will receive a refresher in the fundamental gouge and scraper cutting techniques, learn how to visualize the “bowl inside the wood”, mount and turn the sections of fresh logs between centers to form the outside of the bowl before re-mounting the blank in a chuck to form the inside of the bowl– all the while taking care to maintain the fragile bark edge on the rim of the bowl.
Blanks of wood will be mounted between centers and the “bowl inside the wood” will be before cutting so you control the grain pattern and bark rim position in the finished bowl. We focus on developing an eye for making a pleasing shape while incorporating the bark of the tree as the rim of the bowl. We touch-up your graceful bevel-guided cutting technique thus helping you to form the smooth curves of the bowl. This bowl requires a steady hand as cutting the rim is interrupted--you cut a bit of the high part of the rim then skip to the high part of the other side. We focus on careful aim to get a graceful curve through this interrupted cut. We shape the outside of the bowl, remount the blank in a chuck and cut the inside. At home, the bowls will dry and can easily be sanded with a round sanding pad in a drill. This class does require some prior experience with woodturning. Sign up today– class size is limited to 9.
Tuition: $365.00 plus materials ($35.00 + tax)
Section 120322B: Saturday & Sunday, December 3 & 4, 9:30am—5:00pm
Call 860.647.0303 to sign up for any class on this website
Turn a Bud Vase with Rick Angus
 Spend a day working on improving your spindle turning technique while making a couple of attractive bud vases. The great thing about these bud vases is that they are actually lined with a glass sleeve that nearly disappears from sight and allows for safe containment of liquid. The completed vases are perfect for a flower stem in water, fragrant oil and diffuser reeds or dried flowers. Materials for two vases are included in this one-day class.
While relatively simple in concept, we will use a process that allows completion of the piece on the lathe, including a friction varnish, polish and wax. Choose from an assortment of pieces of wood with interesting character and pick the shape the you desire. We will turn the shape between centers, mount in a chuck to drill a hole sized to accept a glass sleeve. You will use a spindle roughing gouge to form the initial shape, refine the form with a detail gouge or skew chisel and sand dustlessly with water or oil to a smooth finish.
The finishing touch will be a smooth glossy finish on the entire exterior, including the bottom. Just sigh the bottom and enjoy. Turners of all skill levels are welcome.
Section: 100210B: Saturday, October 2, 9:30am – 5:00pm
Small Woodturning Projects with Rick Angus

This weekend class is designed to give beginning and intermediate woodturners a great opportunity to make a number of small projects while learning, polishing and perfecting their turning skills. We start with a review of tools used in turning, tool sharpening, sanding and finishing on the lathe. During the first morning, the projects will be chosen from a list including:
Bud Vase, Spinning Toy Top, Tool Handle for a Reversible Screwdriver, Spoon (with some light carving), Whistle, Rolling Pin, Mushroom and other ideas from students.
Safety is always important and will be emphasized throughout the course. Students will gain valuable experience and make some great projects which will help build confidence to continue the quest to master the art of woodturning. Sigh up today. Space is limited. Tuition: $ 275.00 plus materials ($55.00)
Section 042818B: Saturday & Sunday,
April 28 & 29, 9:30am—5:00pm

The Taming of the Skew with Rick Angus
 Become one with your skew! it’s the only one used during this class.
Chisels likely were the original turning tools and they are today’s go-to tools for leaving a super smooth finish on spindle work. Their versatility includes not only a planing or chamfer cut leaving baby-skin-smooth surfaces but rolling beads in tight places, making shallow coves, end-grain facing, marking distances between features with great accuracy and making notches for starting tight coves with a detail gouge. Its also a great roughing gouge!
Spend a day understanding the variety of chisel profiles available to the modern turner and the benefits of each shape. One will do most spindle tasks but three or four will do nearly everything spindle—yes even coves!
We start with a finely sharpened double beveled, curved, skewed woodturning chisel (The Skew!) provided by the school. With it we will prepare totem poles demonstrating the following cutting techniques:
Rough a billet to a cylinder using two cut types: planing and peeling,
Plane the cylinder to a smooth, uniform diameter round,
Face the endgrain square to the axis,
Cut a chamfer,
Mark features,
Cut notches for beginning beads and coves,
Roll beads and cut shallow coves (small coves best are made with a detail gouge),
Use an angled parting tool (also a chisel) for nearly flawless cut-offs.
If we make good progress, we can make a spinning top from a billet.
Please bring any chisels that you own for evaluation and sharpening. Fortunately, chisel sharpening is straight-forward using a platform and a wheel grinder. Sharpening strategies will be discussed and the grinder, honing (1200 grit) and possibly stropping methods will be used. Students can expect to sharpen one or more of their chisels and use it during the class. Students will be able to balance the amount of turning/sharpening to their individual needs. Sign up today– space is limited.
Tuition: $125.00 plus materials (TBD)
Section 102520B: Sunday, October 25, 9:00am—5:00pm
Spindle Turning for Furniture making with Rick Angus
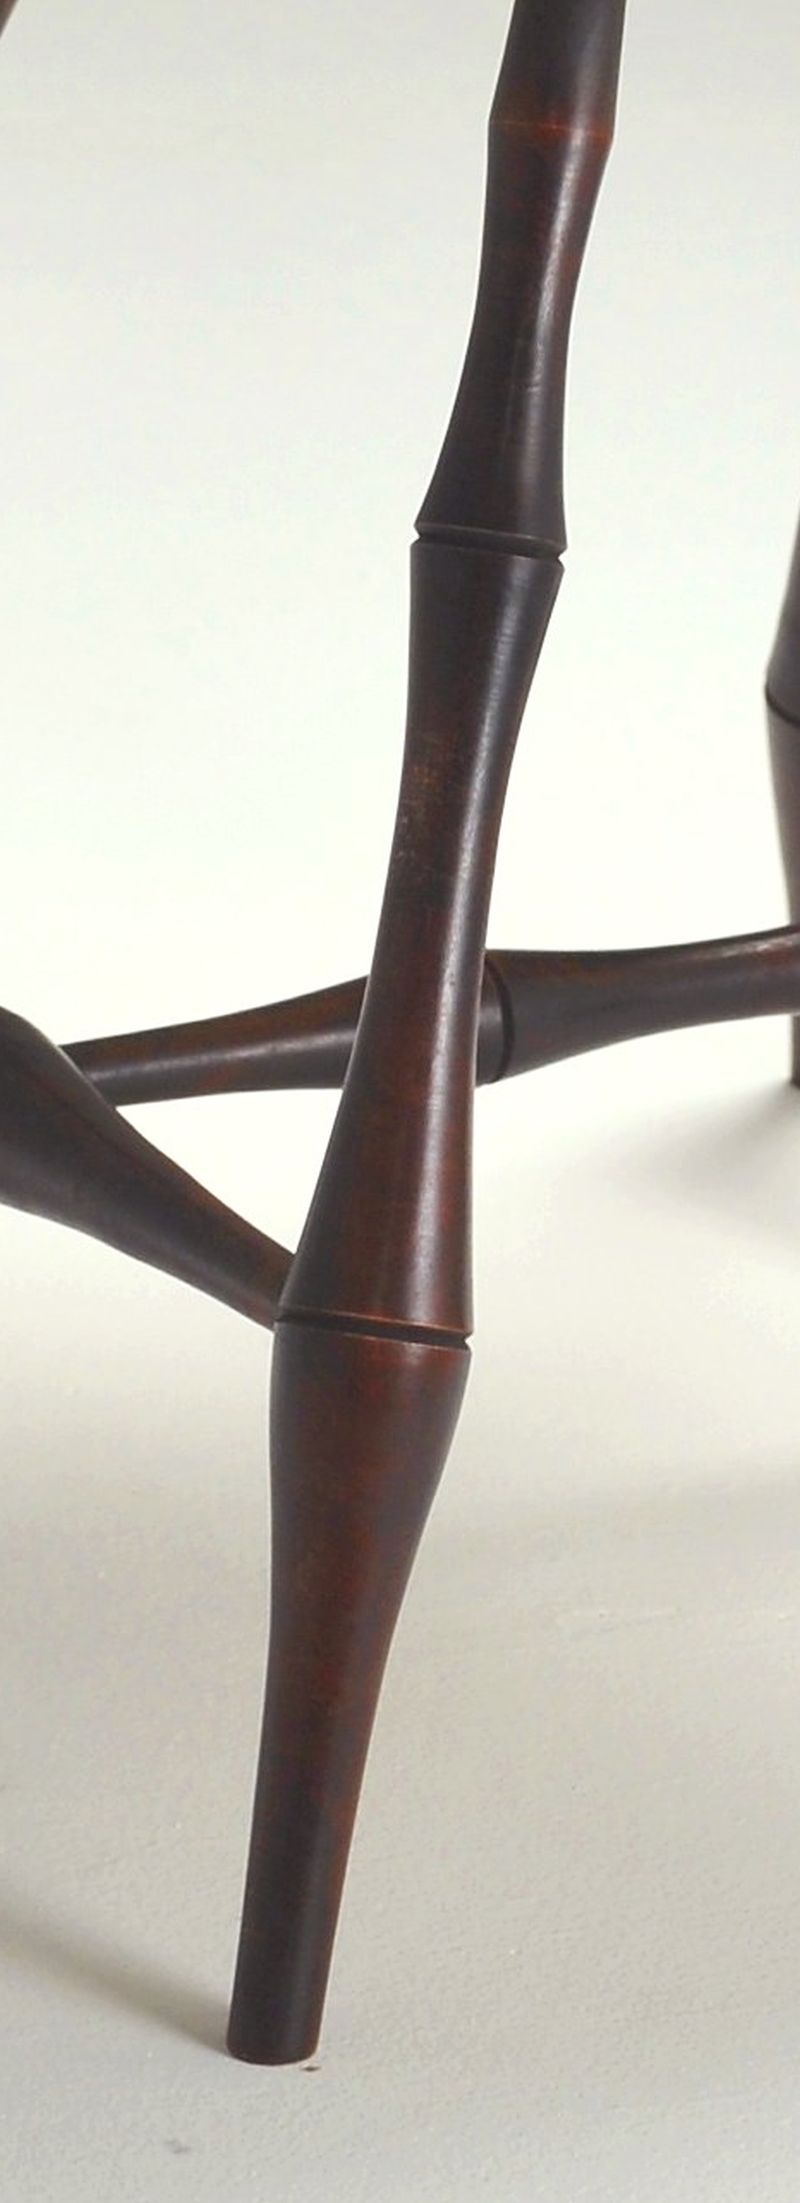 How do the masters make duplicate spindle pieces for furniture—and do it in a profitable manner? The answer? Practice, some special techniques and utilizing a template system which allows easy, quickly and accurate marking of turning blanks. The cutting of the marked piece is done in many small steps, always in the same order, to maintain a consistency in workflow. This gave consistency of finished appearance.
To make a replacement spindle or to make a set of identical pieces, a template is made which has all the features of the piece: coves, beads, cylinders, faces and chamfers. Next, critical diameters and the lengths of features are measured and added to the template. All the information is now at hand to begin producing multiple parts.
Practice & repetition is critical to success in spindle turning– especially if you want all the components to be the same! We will be practicing spindle turning techniques with gouges and with the skew chisel throughout the class.
Rick will be guiding participants in some basic duplicating techniques and then students will move on to making a template and executing their own (withing reason!) project.
The school will provide all materials and tools required but please bring any of your own tools that you would like to use and some designs or design ideas. You should go home with a set of duplicate spindles and the templates that allow you to make even more at home—and the knowledge of how to make more. Sign up today. Space is limited. Tuition: $365.00 plus materials
Section 031321B: Saturday & Sunday, March 13 & 14, 9:30 AM—5:00PM
Turning Lidded Containers with Rick Angus
 Learn to turn these popular lidded containers and let your imagination take over. In this class we will explore the basic techniques on a piece of poplar. This class will review basic spindle turning technique and go on to practice end grain hollowing, Turning a friction fit tenon to fit into the corresponding socket and move on to learning “jam chuck” techniques. Along the way we will get into some basic finishing techniques and explore some of the different shapes and sizes possible in this fun and rewarding class. Sign up today- Space is limited.
Tuition: $365.00 plus materials ($40.00 + tax)
Section 111922B: Saturday & Sunday, November 19 & 20, 9:30am – 5:00pm
Call 860.647.0303 to sign up for any class on this website
Introduction to Segmented Turning with David Heim
 In this style of turning, small wedge-shaped pieces of wood are glued into rings which are then glued to larger pieces of a different color or texture to form a blank ready for turning a bowl or other vessel. The size and shape of these parts can be just about anything your imagination comes up with. Likewise, any number of different woods can be used for contrast or to form a complex, multicolored pattern.
In this class students will learn the process of forming the turning blank and will cut and glue the segments precisely, with a minimum of sanding and trimming. We will explore strategies for clamping the rings during glue-up and investigate how variations in the glued-up blank affect the final pattern in the finished vessel.
This is sure to be a fun and rewarding class. Participants should have some turning experience.
Tuition $365.00 plus materials
Section 031922B: Saturday & Sunday, March 19 & 20, 2022, 9:30am – 5:00pm
Note: This class was previously scheduled for Novemebr 6 & 7, 2021
Turn a Solid Wood Goblet with Rick Angus
 A goblet can be an elegant project to advance your skills. The outside is shaped using classic spindle turning technique but the inside of the bowl requires hollowing that utilizes an end-grain scraping technique which leaves a remarkably smooth surface. Thin walls of the bowl are created by shaping the outside after completing the inside.
We begin with a refresher on spindle turning technique and will use this to create a cylinder with a tenon. Rough shaping of the bowl is spindle turning but the bowl of the goblet is done with a variety of scraping techniques. The bowl shape is finalized with the spindle gouge and we then shape the stem and add small decorative beads and coves. An undercutting parting cut finishes all but a very small stub on the bottom of the foot which is carved or danded off later.
Join Rick for this exciting new class which will fire up your turning skills and have a great time in the process! Space is limited.
Tuition: $365.00 plus materials
Section 040222B: Saturday & Sunday, April 2 & 3, 9:30am—5:00pm
Turning Plates & Platters with Rick Angus
 Wooden plates & platters are great projects to expand your bowl making skills and are a great way to use up off cuts from other projects that are not using thick stock. The design opportunities for plates focuses on creating an attractive rim that looks elegant yet holds food on the plate and allows an easy grip for removing the plate from a table with one hand.
As thin as they are we will analyze how the shallow “bowl” portion in the center accommodates the relationship between the rim (that you see mostly from the top) and a wide foot (seen mostly from the bottom). The key to this analysis is the side view and we use some examples of plates cut through the middle to expose the profile of the plate.
Students review all bowl-making techniques using deep gouges and scrapers within this thin-bowl design constraint.
The class focuses on designing and creating details on the rim and foot of the plate– and– having a good time of course!! Sign up today– space is limited. Tuition: $ 345.00 plus materials
Section 030222B: Wednesday evenings, March 2—April 6, 6:00pm—9:30pm
The Taming of the Skew with Rick Angus
Become one with your skew! It’s the only tool we will use during this class.
Chisels likely were the original turning tools and they are today’s go-to tools for leaving a super smooth finish on spindle work. Their versatility includes not only a planing cuts that leave a super smooth surfaces but rolling beads in tight places, making shallow coves, end-grain cuts and making notches for starting tight coves with a detail gouge. Its also a great roughing gouge!
Spend a day understanding the variety of chisel profiles available to the modern turner and the benefits of each shape.
Sign up today– space is limited.
Tuition: $145.00 plus materials (TBD).
Section 050122B: Sunday, May 1, 9:30am—5:00pm
Basic "Brown and Shiny" with Mike Mascelli
This class specifically designed for furniture makers who are frustrated finishers. We will cover the most common wood coloring and finishing tasks, using readily available “off the shelf” materials and equipment. Scope will include finishing new and antique wood, using brush, pad, and aerosol techniques. We will not cover the use of spray equipment.
Topics will include:
- How surface preparation affects the look
- The basic chemistry of dyes and pigments
- The irreplaceable organics: Shellac, asphaltum and linseed oil
- A primer on lacquer, poly, and waterbase finishes
- Getting a professional look with glazing, toning and shading
- Matching an existing finish
- Simple spot repair techniques – Faux finishing
- How to figure out what is in the can
- Rubbing out a finish
Students will do hands on activities to create a number of well-known finishes including Pumpkin Pine, Aged Oak, Perfect Cherry, and Classic Mahogany, on various woods, as well as techniques for “popping the grain” adding shadow lines, rubbing out, and creating custom appearances. Students are encouraged to bring small projects, or samples of their choice. Tuition: $275.00 plus materials Sign up today- Space is limited. 
Section 100816B: Saturday & Sunday, October 8 & 9, 9:30am – 5:00pm
The Case for Using Shellac in Fine Finishing with Tad Fallon
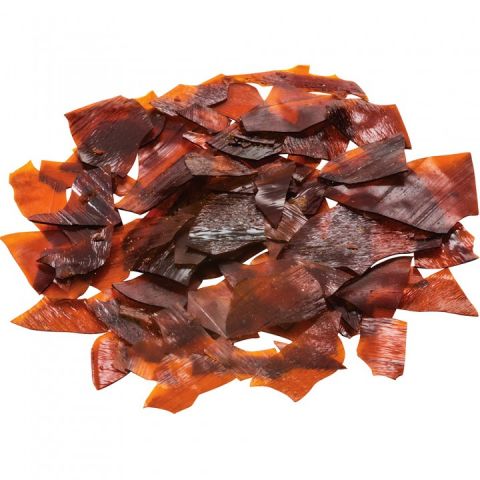 As furniture conservator, I often rely on shellac as my go-to finish, for its tremendous versatility and proven long-term stability. Shellac is a beautiful and durable finish for a wide range of applications. It is also re-treatable; as a solvent release finish it is continuously soluble in its carrier, denatured alcohol. This important distinction allows a shellac finish to be easily repaired, both on-site and in the studio. Shellac is also ideal for touch-ups, using pigments and dyes with prepared shellac as a binder.
In this two day workshop, we will explore the various varieties of shellac, learning to recognize the subtle differences between the types that can be utilized according to the needs of the project. French Polishing will be discussed and demonstrated, along with a “modified” padding technique where oil is not used. Both brushing and padding methods and materials will be reviewed and discussed. The repair and touch up of a previously finished piece will also be discussed and demonstrated, and will incorporate pigments, dyes, brushes, and matting agents. Professional touch-up kits will be available for optional purchase.
Tad Fallon is the co-owner of Fallon & Wilkinson - a small furniture conservation shop that specializes in restoring 18th & 19th century high end furniture. Tad has written numerous papers for the trade and has taught many workshops for professional furniture conservators. Sign up today! Tuition $275.00 plus materials.
New 2016 weekend dates coming soon.
A Woodworker's Guide to Finishing with Mike Pekovich

Every woodworker knows the joy and stress of putting on that first coat of finish on a project. A finish can bring out the beauty of a piece, but it can also highlight every flaw. Add to that the wide range of dyes, stains and finishing products on the market and the finishing process can get down right scary. In this class, you’ll learn how easy it is to get the silky smooth, low-luster finish that is the hallmark of handcrafted furniture using a simple wipe-on finish. But there’s more to it than following the instructions on the can. Mike Pekovich, art director of Fine Woodworking magazine, will show you a simple step-by-step process that will yield excellent results every time.
The class will cover everything you need to know from preparing the surface to building a finish to final waxing. You'll also learn a simple 30-minute finish that's perfect for small projects and last-minute gifts.
And in the event you need to add a little color to your work, Mike will offer tips for preventing blotching and a strategy for combining dyes and stains in order to dial in the perfect color. Tuition: $125.00 Materials are included.
This class will be scheduled again fall 2018
Zen of French Polish with John Coffey
French polish is a technique for putting shellac on wood as a finish. Shellac is perhaps the most versatile finish that can be used to finish furniture–it is hard and durable, it is restorable without having to remove it, and best of all it may be the most beautiful finish you could put on a piece of furniture!
One main benefit of French polish is it can be applied in less than ideal finishing conditions. Dust is not an issue as the polish dries almost as soon as it is rubbed on. The polisher can stop at any time in the process and pick it up at a later date. Best of all, the technique puts very little material on a surface, even irregular ones.
As an antique restorer, I am often required to put on a finish that preserves the color and texture of their surface–I cannot sand the surface. French polishing is uniquely suited for this task. The technique follows the undulating character of old surfaces, or handplaned surfaces, filling the grain until the surface is lustrous and polished.
In a two-day class I will show my technique for French polishing by assisting the student in their own project. The student can expect to be well on his way to finishing a small table or chest but, more importantly, will learn the skill of applying shellac using a pad in such a way that only the thinnest of coatings will be between the observer and the object, allowing the natural beauty of the wood to show through.
The woodworker spends so much time selecting just the right board, perfecting his or her technique on cutting dovetails and tenons, why not make sure the work receives what it deserves–the best finish possible. The old saw is never truer: while a good finish might be able to hide poor woodworking, a bad finish will take away from even the best work.
John Coffey is a restorer of antique furniture & millwork in Locust Valley, NY. John has taken conservation classes at the Smithsonian Institute and at Dakota County Technical College (MN) with senior conservator at the Smithsonian, Donald C. Williams. He has assisted with the "Ten Thousand Springs Pavilion" exhibit for the Smithsonian Institute in both Washington, D.C. and when it was in Flushing, Queens, N.Y. John holds a Bachelor of Science degree from Hobart College (NY). Sign up today!
Tuition: $365.00 plus materials ($30.00 + tax)
Section 021123B: Saturday & Sunday, February 11 & 12, 9:30am—5:00pm
Call 860.647.0303 to sign up for any class on this website
Arts & Crafts Style Coffee Table
This class is essentially the same as the Shaker Hall Table class but features a different project. The class further develops the skills begun in Woodworking I and adds new ones such as using a handplane to surface furniture parts, matching grain to achieve a harmonious looking piece, hand-fitting mortice and tenons joints, gluing up a table top and more. This class also features wedged thru mortise & tenons which look great and are a good challenge to your woodworking skills. The project is a cherry coffee table which is approximately 22" X 46", has a lower shelf for books or magazines and will look great in just about any room. Because of the difference in styles you might want to do this class even if you have already done the Hall Table. Tuition: $295.00 (plus materials).
Woodworking II
Arts & Crafts Style Hall Table
An eight-session (or four - day) class that is a continuation of the Woodworking I class. This new project features a handsome Arts & Crafts style hall or sofa table which fits in just about any home . The project is a perfect vehicle to learn new skills with handtools and powertools while making a valuable piece of furniture that will become a family heirloom. Techniques learned in the woodworking I are reinforced as new techniques and skills are introduced. Laying out, cutting and handfitting mortice and tenon joints, a dovetailed drawer, grain matching a table top, tricks for gluing up a whole piece of furniture, and using effectively using handplanes, card scrapers and chisels are just a few of the skills students will learn while making a cherry hall table as their project. Woodworking I is a prerequisite. Tuition: $355.00 plus materials .
Section 040912A: Monday evenings, April 9 - June 4, 6:00pm - 9:30pm
general tool list· (will open in a new window)
Main Menu
Class Images

![]()


Testimonials
Bob,
Just a quick note to say how much I appreciated and benefitted from the recent 5 week intensive. I hope you get as much satisfaction in teaching it as we received knowledge from the class. I didn’t return with a trinket, a box or a table … but I did return with a better understanding of workmanship and the process to get there. That was exactly what I was looking for.
The dovetails continue to improve (someday they’ll meet my standards), the L-fence is already on the saw and you gave me sufficient challenges to keep me busy for some time.
I hope our paths cross again.
Best,
Butch
5/21/2021
Bob,
Thanks for the last five weeks. This was one of the best learning experiences I have ever had. Thanks for your patience and I look forward to taking more courses in the future. Meanwhile, this summer, I'll keep practicing dovetails and I'll look forward to seeing you at the open house.
Myles